
We built a shower into the garage for dog washing, but if we had children I could see it being equally useful. When we lived in the trailer dirt was just a fact of life. Now that we are in a house it is refreshing to have as little dirt as possible. Now Dazey and Enzo can do their dirt rolls and I wash em down on the way back through the garage rear door. It’s the little things.
Category: House Build
-
Solar Powered
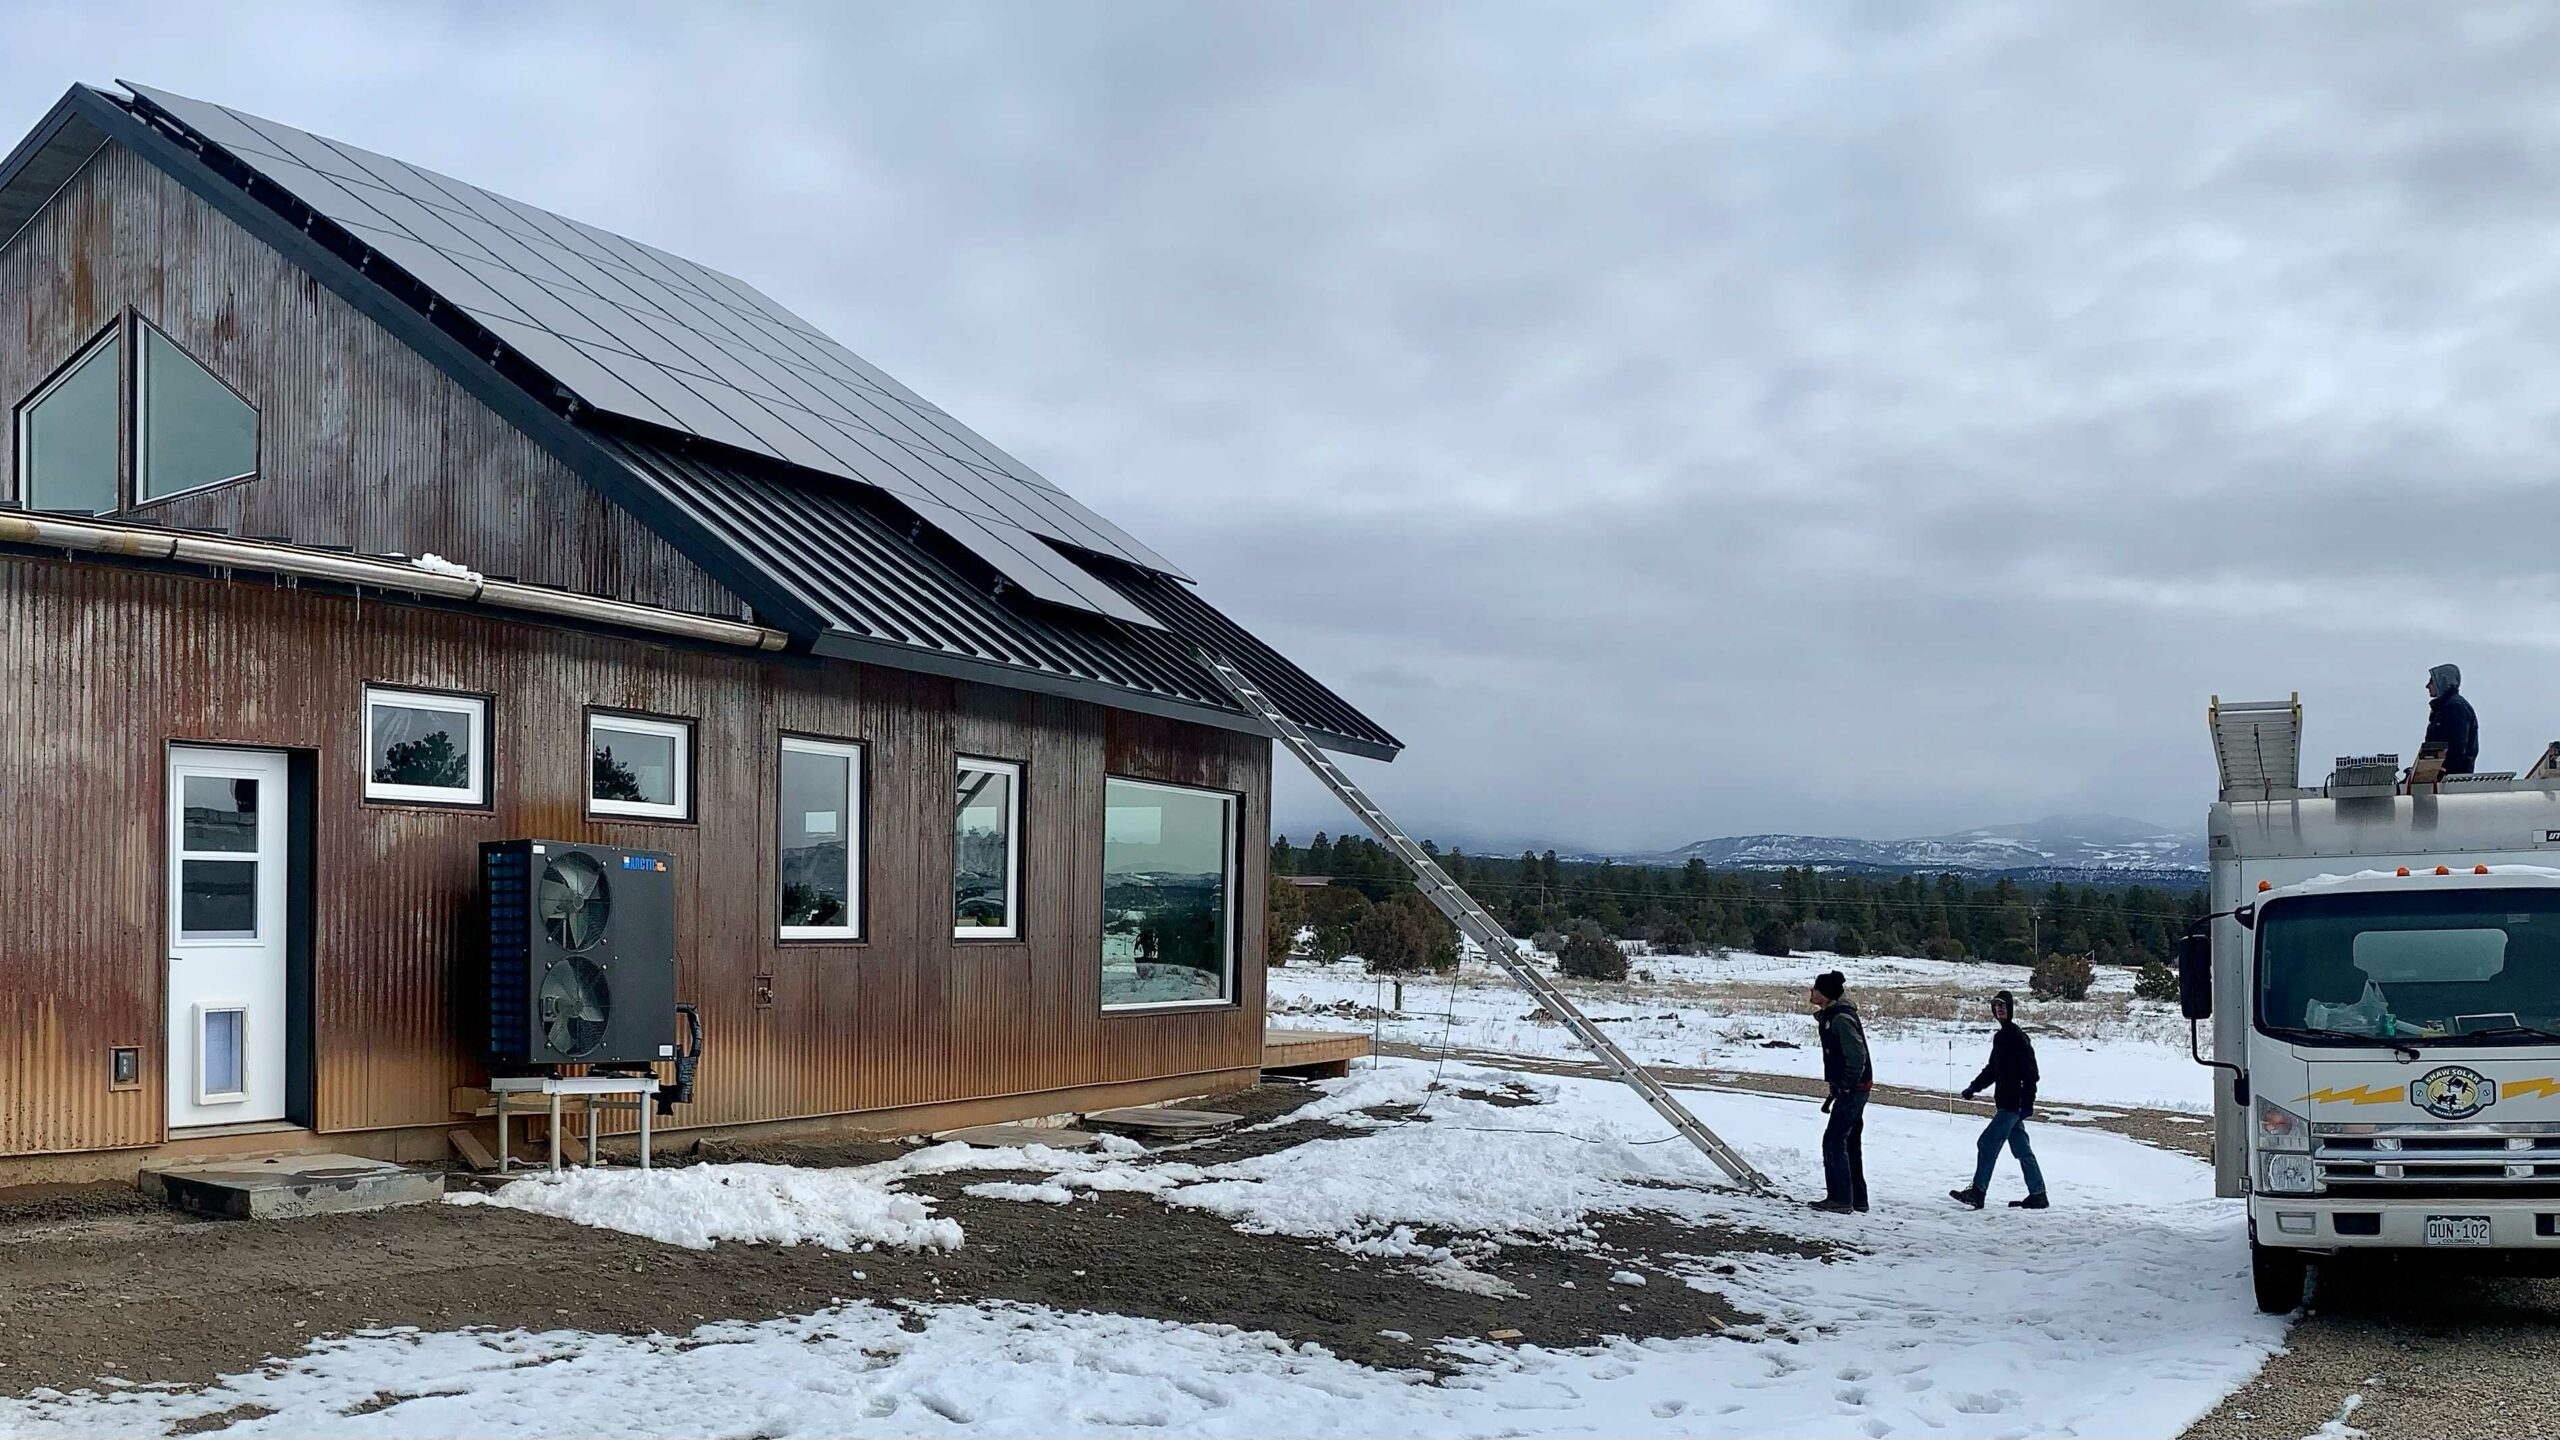
The solar install was completed today, for the most part. The install is done and working. Now we have to wait on the State of Colorado electrical inspector and then our power utility inspector. That should take less than 2 weeks and then we will be putting juice back onto the grid and eliminating our homes power bill.
The main issue preventing solar power adoption is the large up front cost. The payoff for our system is estimated to be ten years. Thats with no increase in utility rates. When we added solar to our home in Phoenix it paid for itself in five years. Solar works and everyone who owns their home should seriously consider getting it.
Currently there are a lot of tax rebates available but those are in the process of being phased out. The US Federal tax credit for renewable energy purchases is currently set to 26% for 2022. It drops to 23% in 2023 and expires in 2024 unless congress extends it, again. When we did our home in Phoenix it was a 30% credit and people still complained it wasn’t enough.
Your state and utility company may also have additional credits available. You should do some research and even call the utility company to learn more. This is also a good idea to check on if you are buying any energy efficient equipment. The incentives are there to make this improvements, you just need to find out about them.
Once you determine that getting solar on your home makes sense you should start looking for companies that specialize in solar installation. You want to be wary of any company that pushes leasing the system though. Leasing a solar system on your home is a terrible idea.
When you lease solar you are putting equipment on your roof that you do not own. You avoid the large upfront cost and just have a monthly payment to make. You save some money on your electric bill and sleep knowing you are helping to reduce the use of fossil fuels. The problem comes if you need to sell your home.
Ideally the buyer accepts your lease for the solar equipment and everyone is happy. Unfortunately ideally does not happen the majority of the time and you have to pay to remove the system. You also have to pay an early termination fee for breaking the lease. In the end if you don’t have the ability to pay for the system up front you should reconsider getting it until you can pay for it.
Past the leasing debacle you want to make sure that the company you hire has its own master electrician on staff. A lot of installers hire a master electrician as a subcontractor for the installations. The majority of the install is putting the racking and panels on the roof. The electrician doesn’t have a lot to do but they do have the most important part of the job. If the company has one on staff they are less likely to have delays. Also if and or when there is an issue the company will be faster to send the electrician back out.
When you talk with the companies to get quotes they should absolutely come out to see your property. They should check for trees or other shade creating objects that will cause issues with solar production. They should check for access to your electrical panel and also that it is big enough for them to add more circuits. For our home in Phoenix we needed to get a larger panel.
They should ask to take a look at your prior 12 months of electrical usage. If you don’t have 12 months, like us, then they should ask for a list of all electrical devices in the home. They should also get details about insulation values. Then they can create a simulation of annual usage.
From the annual usage they will be able to determine the size of your system. When I did some math on this last year before the build even began I came up with us needing a 16kW system. That included us having an Electric Vehicle and charging it at home. We do not have an EV yet so the installers estimate of a 12kW system makes sense, we hope.
Understanding the technical aspects of your solar system can be helpful. It’s a good idea to have a general understanding of how the system works and how it will be installed. The installation company should take time to go over these details with you in their quote. You should also expect them to handle coordinating with your utility company and they should have a good relationship with the utility company.
The quote should be clear and easy to understand. They should have the total price at the top. That is the number you are going to need to pay over the course of the install. There will be an upfront deposit, then another payment once the install is done, and a final payment once the utility signs off and lets you create juice. Don’t count on the rebates coming in during the project. Be able to pay and keep feeding your family otherwise wait till you can.
The quote should list out the details of the equipment they are selling you and all the steps they are handling, like talking with the utility company. It should also show you the payment details and finally the installation process. Get a few quotes.
The coolest thing about having solar on your home is that the home will always be able to pay its electric bill. Once you install the system the warranties are over 20 years for pretty much all of the equipment and since there are no moving parts they just work. Just do it.
-
Getting solar installed
One thing we designed our home to have is a large south facing steep roof. This gives us a perfect platform to install solar panels. The initial plan is to have them tied to the grid to offset our electrical usage. This saves us all of the money we pay for power and helps reduce the need for coal powered electrical generation.
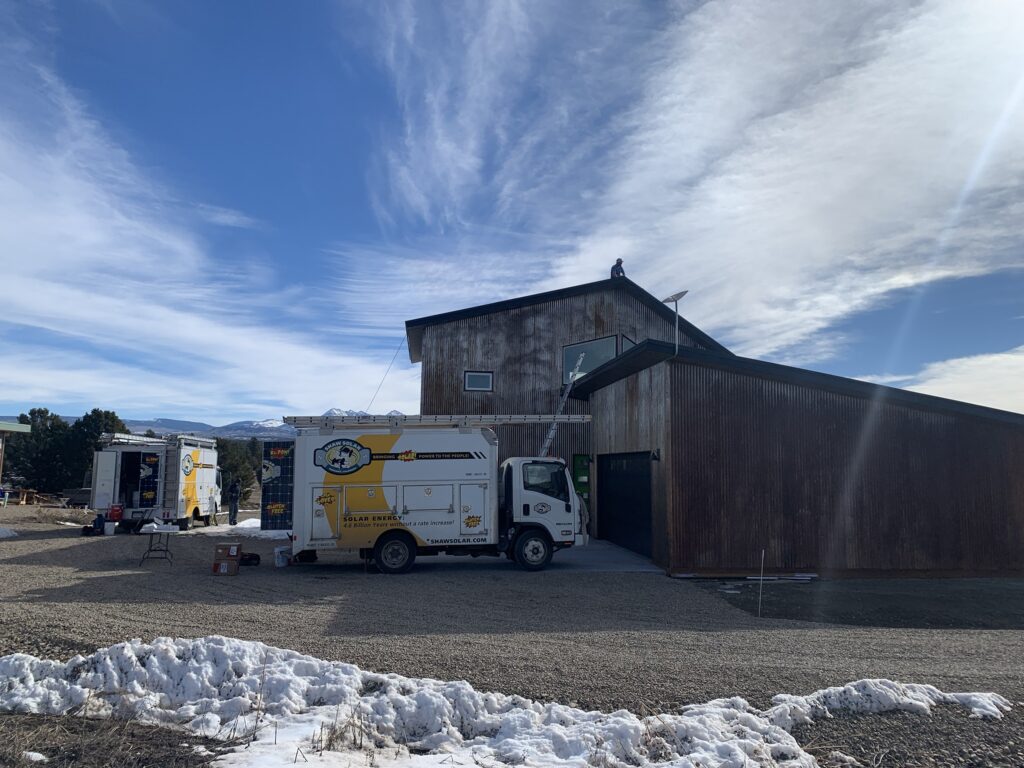
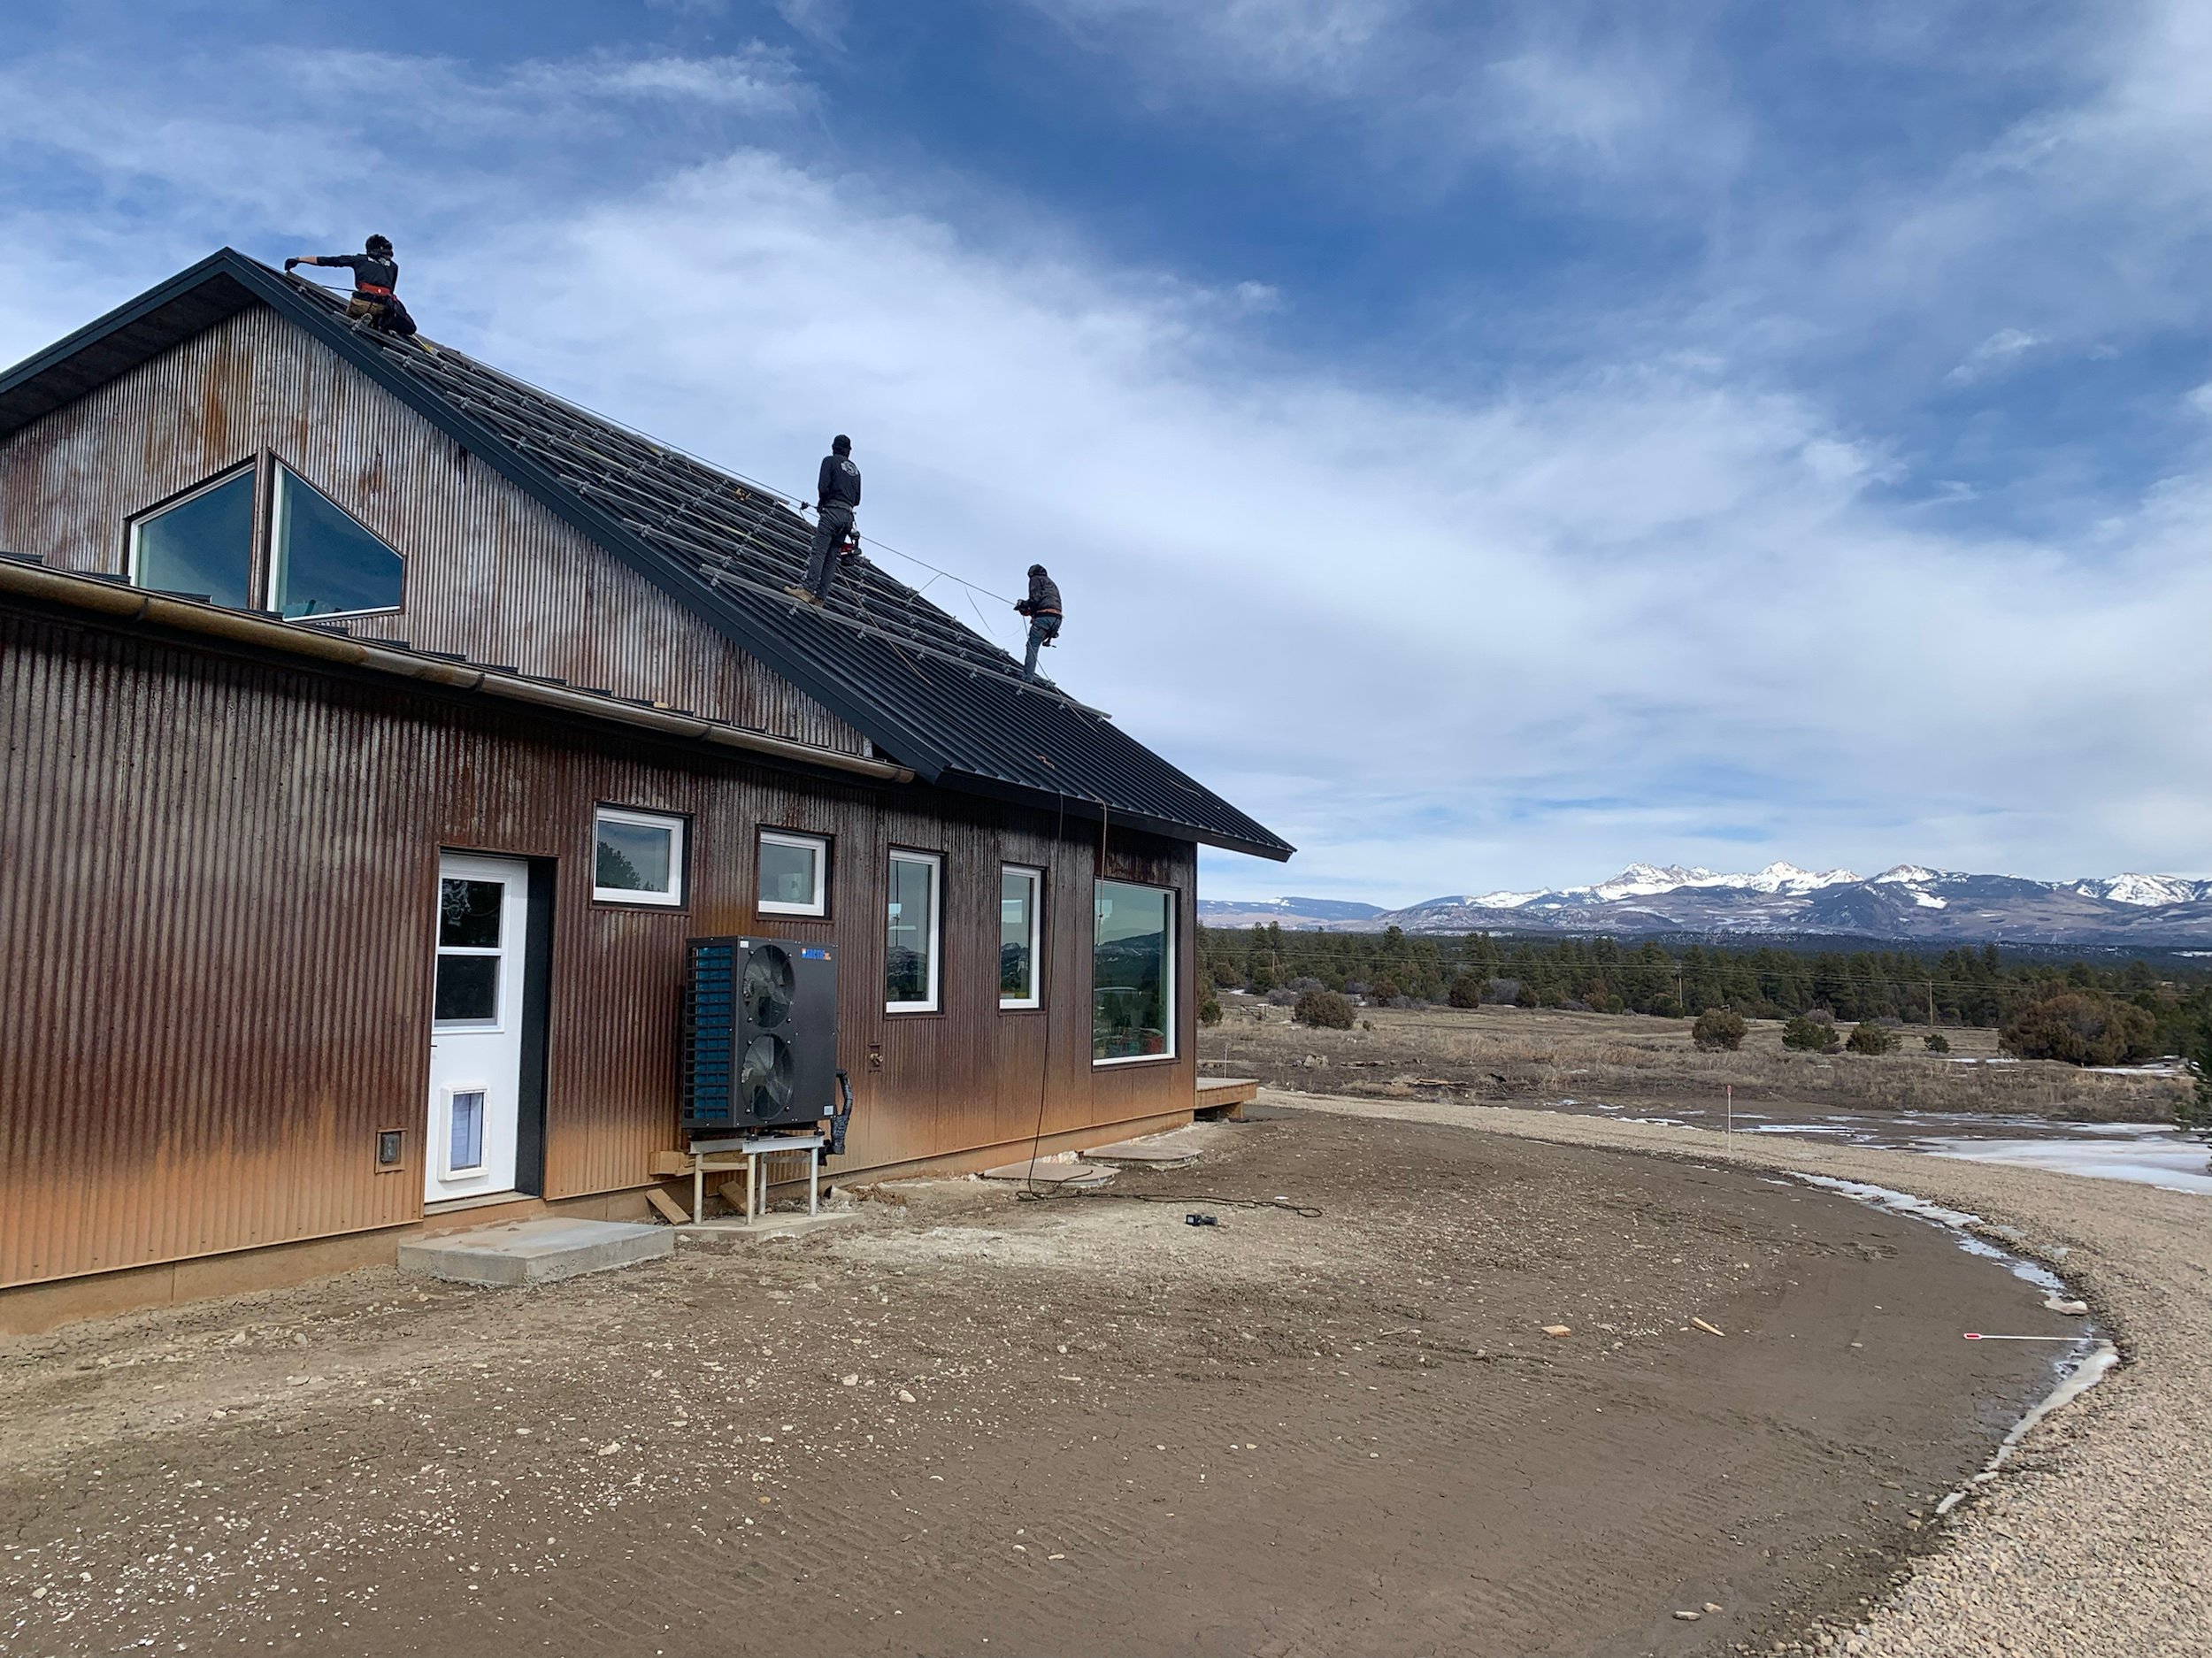
They got cool trucks. Today the solar installation crew showed up and got to work. They got all of the roof racking installed and most of the inverter and electrical wiring. On Monday they will be back to complete the panel install.
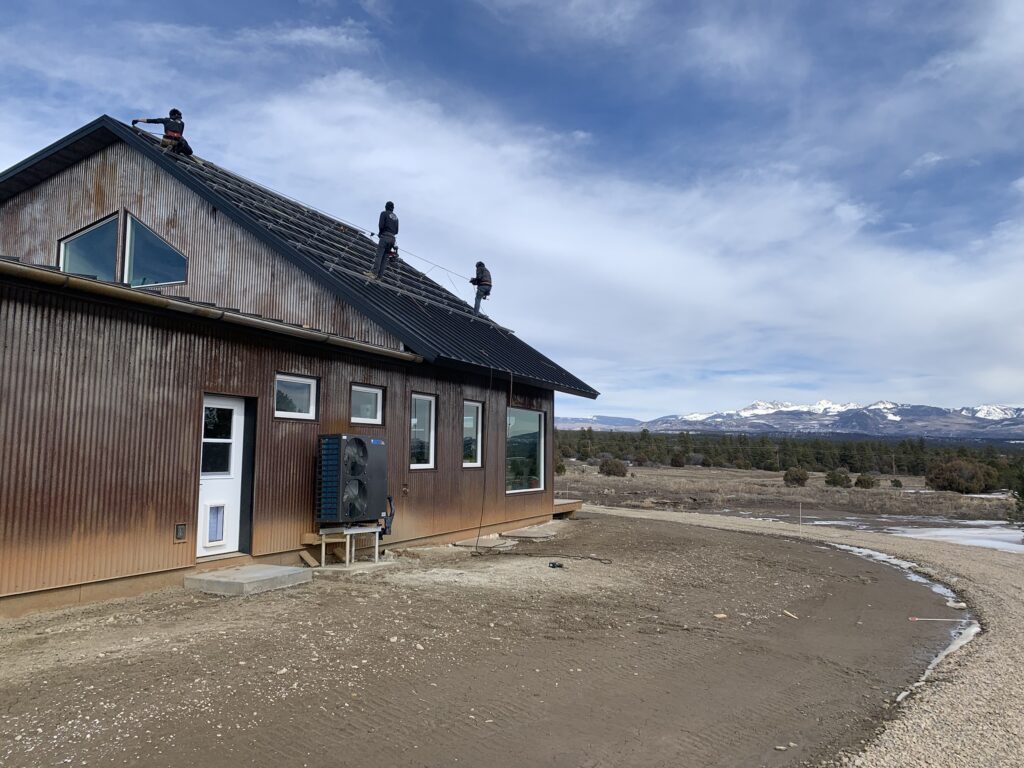
Rack em up! 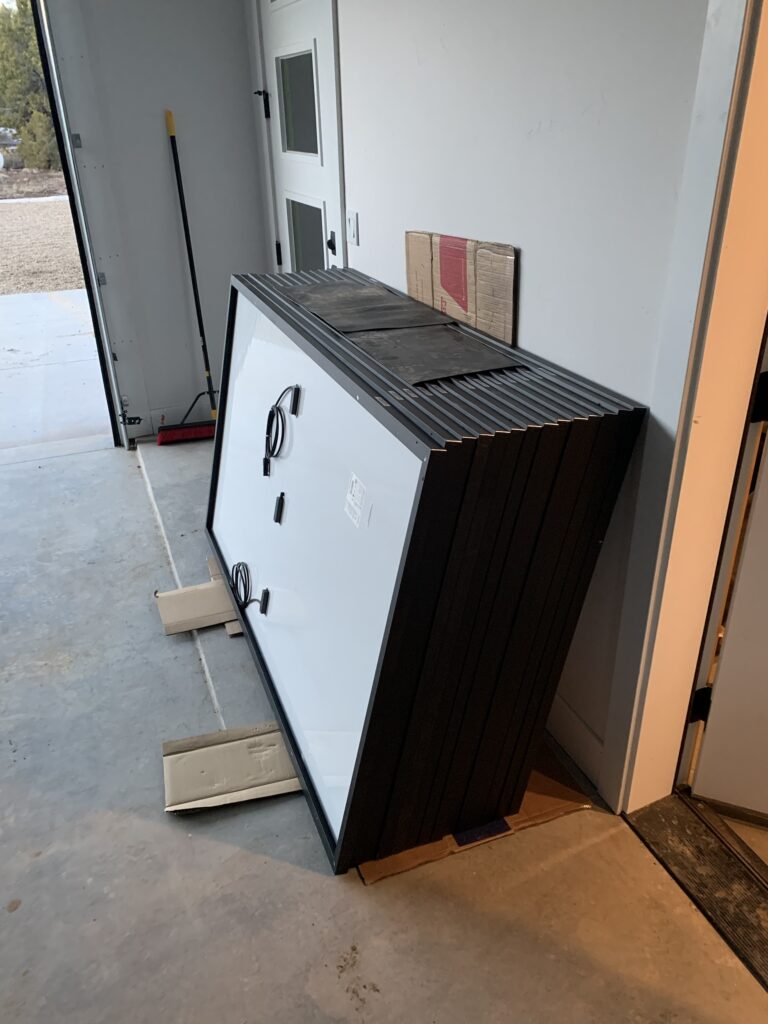
14 of the 34 panels Once that is done we have to wait a week for the state inspector to approve the install. Then the electric company will come by to check everything is connected to the grid correctly. Then we will be live.
-
Outsmarting the smart home
Last year I bought our first HomePod Mini and our adventure into building a smart home began. The HomePod mini works as a hub for Apple’s HomeKit smart home system. Basically the HomePod mini works as an always on computer for the various smart devices to connect to.
One of the first smart devices we purchased was this smart switch from Meross. It’s an inexpensive device that connects to the HomePod via Wi-Fi. The advantage of adding a smart switch is that you are able to control it via your phone or Siri in various ways. For the most part they work great and we have 5 in our house at the moment.
One issue that has come up is that the switch will lose connection to the network. When this happens the small status light on the switch starts flashing to let you know it is not connected. Re-connecting this specific switch requires you to enter an 8 digit code.
Unfortunately the manufacturer has placed this code on the switch underneath the switch cover. If the switch is by itself removing the cover only requires unscrewing 2 screws. If the switch is located with other switches the number of screws increases by 2 for each switch. Removing the cover in those cases can be considered to be a pain in the ass.
After having to do this a couple of times I realized I could just take a photo of the switches without the cover and then have the codes always available. I then created a photo album titled ‘Smart Home’ so that we can reference if we need to reconnect any of them.
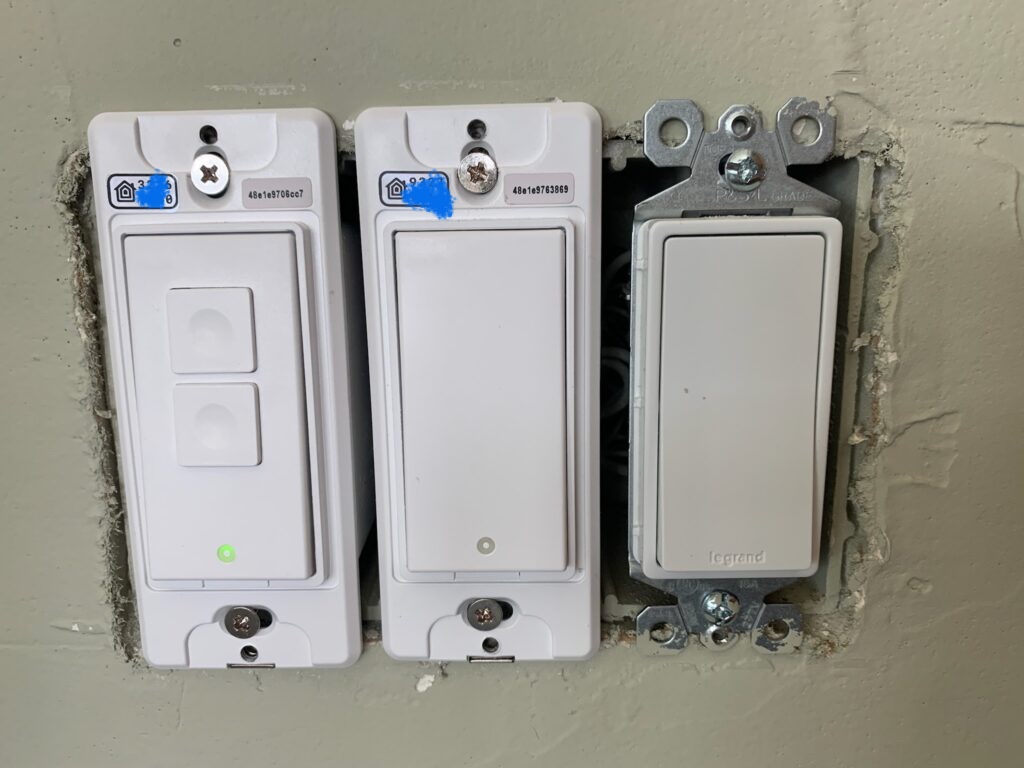
The switch on the left is a dimmable smart switch. We have not update the switch on the right as it’s part of a 3 way switch. These are more expensive and also we have not yet found a need to upgrade that light so far. There are more expensive smart switches that have a separate hub and supposedly have less issue with disconnecting from the network. So far the disconnect issues have been very minor and adding a hub to the network is less than ideal for me. It is still early days for our smart home experiment so this may change.
-
Double the outlets
As Kate and I inhabit our new home we have been 99% satisfied with how everything came out. The only complaint is that we should have doubled the electrical outlets. Especially in the garage, mudroom, and bedrooms. Its really hard to run wires once the insulation and drywall are installed.
-

Home Theater
I have always enjoyed watching movies and TV. I enjoy all kinds of shows and use Youtube extensively for educational and entertainment purposes. I am not a hard core fan of anything but I do enjoy watching moving pictures. I enjoy going to the theater but it can be annoying when people want to talk during a show. Also with the pandemic theaters are now a no go for me.
When we started designing our home I knew I wanted a basement with a home theater. I knew that Kate would be smart and get us a place to sleep and eat, but I was focused on one thing: Having a large screen and surround sound system for watching movies.
At the start I wanted to have two thirds of the basement be one huge open room. It would have been 23 feet wide and 27 feet long. Then our builder told me how large of a beam they would need to install to make that work. We quickly redesigned the basement to have a weight bearing wall halfway across the 27 foot run. This added two bedrooms/offices/workout rooms at the south end, with a large room in the center.
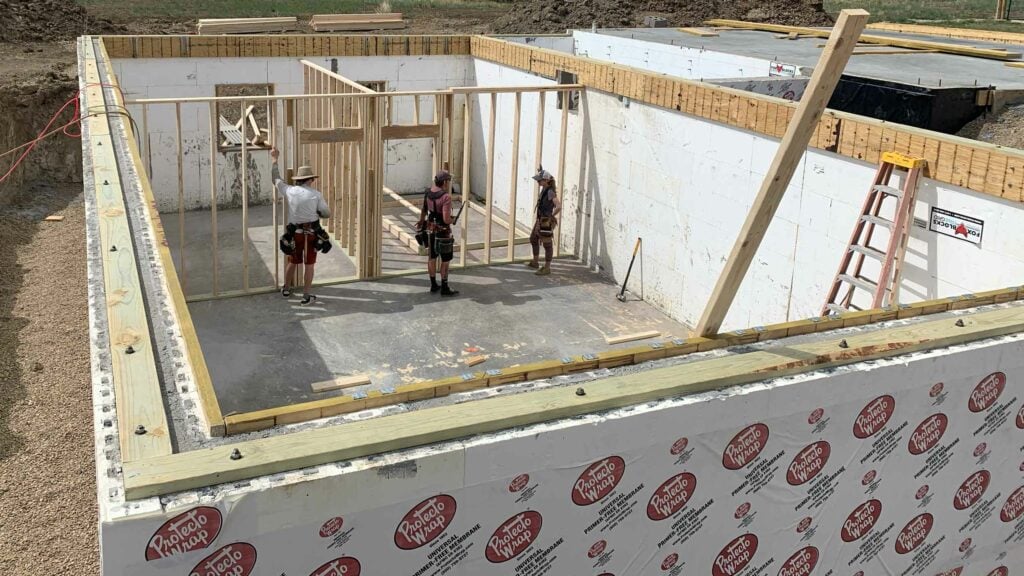
Weight bearing wall installed. While the center room ended up about half the size I had originally wanted, it was still plenty large enough for a 120 inch projector screen. Going from a 13 inch laptop would be quite the upgrade.
With the room size determined, layout was the next focus. For a projector to create a 120 inch screen you generally want about 12 feet of distance from the lens to the screen. That is also the ideal distance to sit from a 120 inch screen so that you can see everything without turning your head.
Since the room is 23 feet by 13 feet I could have pointed the projector to any wall in the room. However from a sound system perspective it is best to have some distance behind your head and the back wall. This allows you to place the rear and surround channel speakers further behind for greater effect. It also helps with reverb and acoustic stuff.
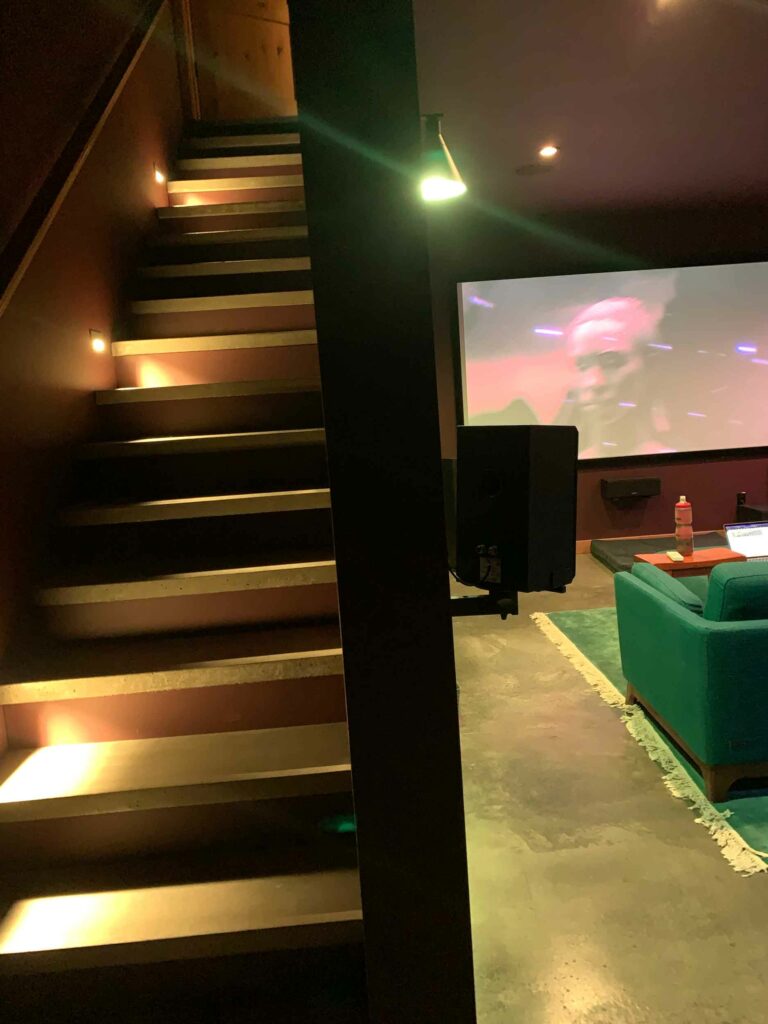
With sound in mind it made sense to either place the screen on the east or west wall. Since the stairwell comes down to the west it made the most sense to place the screen on the east wall. This would allow me to place low level stair lights that would not effect the image quality. Also when you enter the theater room you aren’t walking in front of the screen.
One thing I picked up while learning about home theater design is to place your receiver and electrical equipment to one side of the room. Then you don’t have to see the lights from the equipment when watching the screen.
The stairwell comes down on the north side of the theater room. So we added a cubby hole under the stairs where I can put the electronics, with room for expansion.
Whats in the cubby? With the location of the receiver determined I knew where to run all the speaker wire. The question was how many speakers to run. Dolby surround sound comes in a number of flavors:
- 5.1 is the bare minimum with the standard left and right front channels, a center channel, two surround channels, and one subwoofer.
- 5.2 adds a sub.
- 7.1 and 7..2 add two rear channel speakers.
- 5.1.2, 5.2.2, 7.1.2, and 7.2.2 adds two height channel speakers also known as Atmos.
- 5.1.4, 5.2.4, 7.1.4, and 7.2.4 adds four height/Atmos channel speakers
The most common setup is 5.1 and this is also the most common option recorded in most movies. More and more movies are adding height/Atmos support. I figured that speaker wire is pretty cheap so wired the room for 7.2.4 with the plan to setup 5.1.4 initially.
There were a few factors in opting for 5.1.4 for the initial setup:
- There would be fewer speakers, which saves money.
- I would only need a main receiver/amp to power everything.
- The improvement in sound over my laptop would be incredible and probably enough, for now.
Once I had the layout configured it was time to start shopping for speakers, receiver, and projector. This is where I started feeling overwhelmed with the options and costs. It turns out that speakers, receivers, and projectors can all get crazy expensive and complicated.
In the end I went with some solid Sony speakers that didn’t break the bank but were high enough quality that they make the room feel solid. One thing I learned is that you want to stick with one speaker manufacturer for the entire system of speakers. Apparently they are tuned to each other or something like that. I feel like I read this on enough different websites and forums that it might be the truth and not some way for speaker manufacturers to sell more stuff.
I spent a solid chunk of change on the receiver to get 5.2.4 of speaker channels without an external amp. It also has future support for 8K projectors when we start using them in 4 to 5 years. The receiver should outlast the speakers and projector, so it made sense to invest there. I went with a Denon AVR-X4700H.
For the projector I initially thought I would go with a 1080p resolution as that would be good enough, and it would keep the costs down. As 2021 progressed the price of the BenQ HT2050A crept upward to $700 while its 4K replacement, the BenQ HT3550, was holding at around $1700. More than doubling the price but giving me beautiful 4K resolution. Then I saw a refurbished option for just over $1200 and jumped on that.
With the equipment selected I needed to start thinking about finishing the theater room. Paint was a big decision. You do not want to use white or any bright colors in a theater room. The light from the projector or TV will bounce off of the bright walls and wash out the image. Ideally black is the best color for a theater room as it absorbs the light and makes for the best viewing experiences.
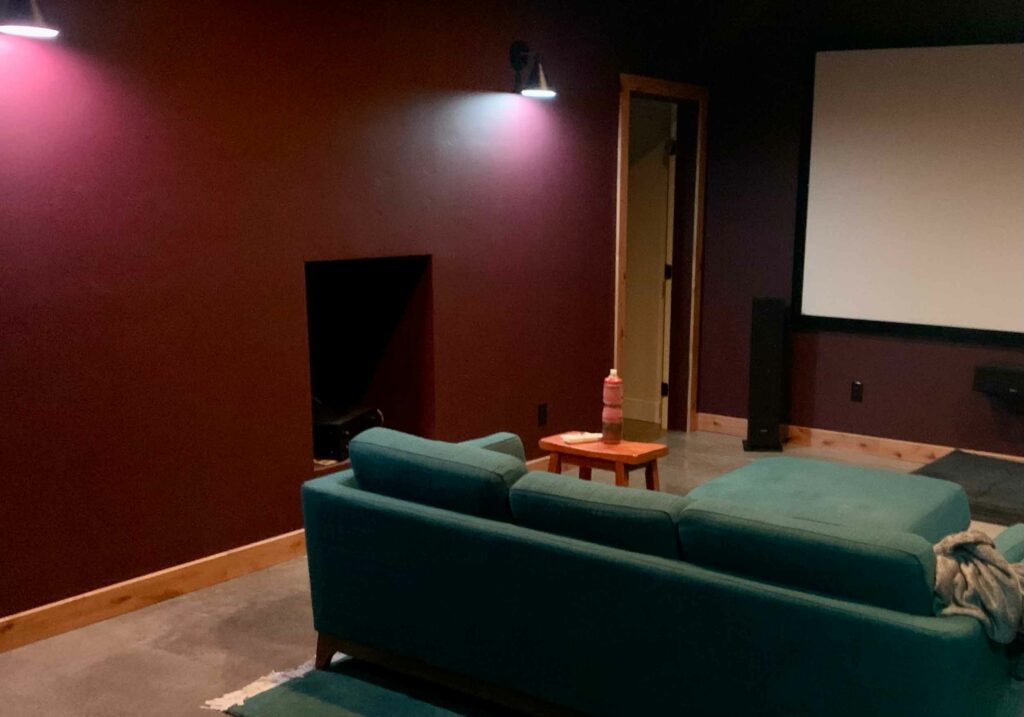
Unfortunately a black room is also a bit terrifying because it is black. Burgundy is often used instead to create a more comfortable room when you have the lights up and aren’t watching a movie. While we were looking at paint colors for the rest of the house I started evaluating dark reds. Eventually I settled on Sherwin Williams’ Merlot.
Color is the most subjective thing I can think of and I got quite a few side glances from the builders when I proposed painting the stairwell and entire theater room with this dark color. I had a few panic moments over my decision, especially after it was first applied to the walls and ceiling. In its wet state it gave off a lot of sheen and looked really scary.
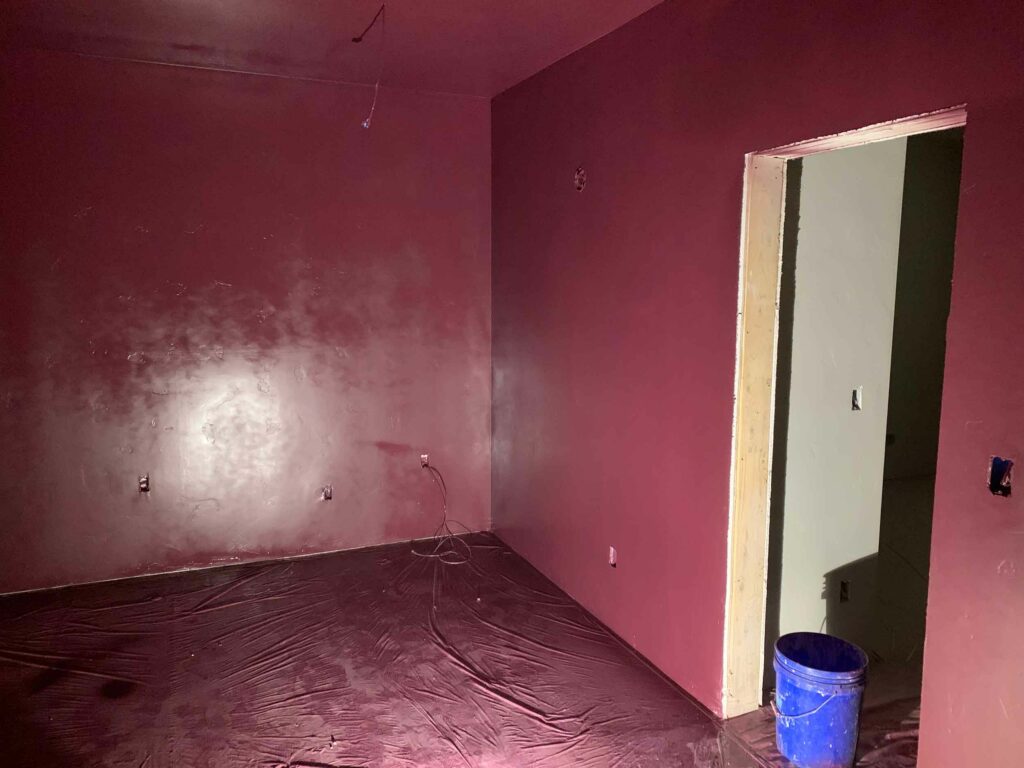
Something from a horror film. Fortunately it dried to the correct sheen and became much more comfortable to live in. I am really happy with how it came out and think that it works well when watching a film but also is nice to sit in with the lights on. I primarily work from this room sitting on the couch.
I have learned to leave the projector off during the workday as it is just too distracting. One really cool thing about the Apple TV is that I can use the projector as a monitor with no cables involved.
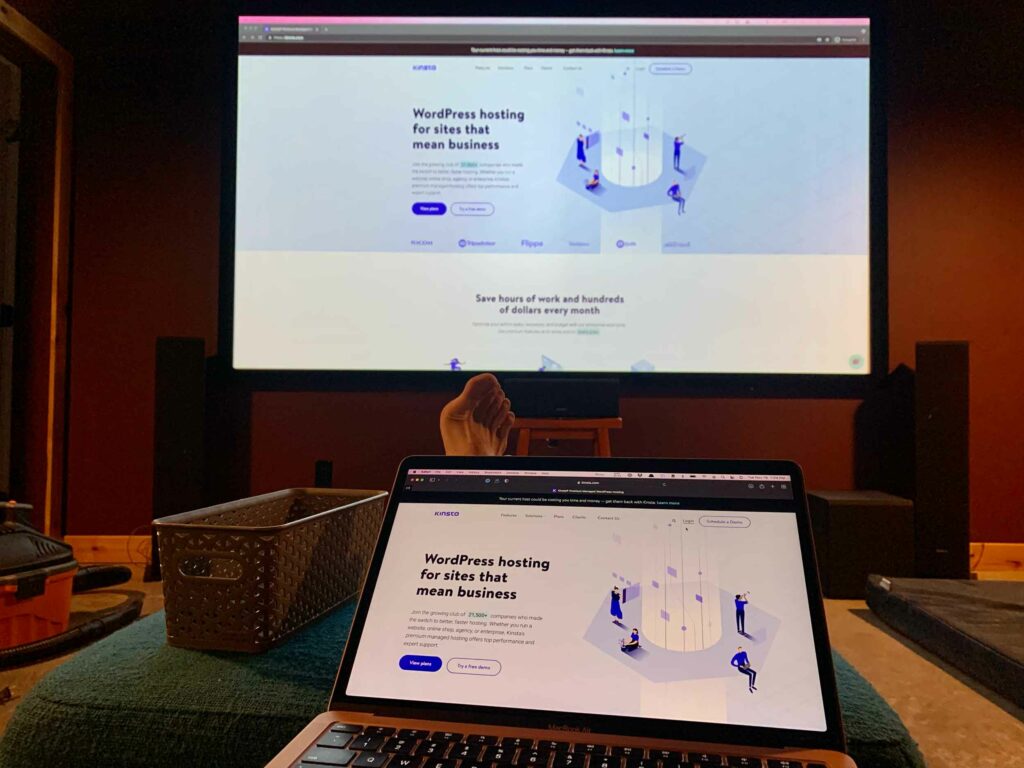
More of a novelty than anything productive. With the walls painted and the house finished it was time to install and test the setup. I was pretty nervous about the speaker wiring and if I had installed it all correctly. I was also nervous as a lot of construction happened after I installed the wiring. Did the dry-wallers cut or crimp any of the wiring?
Fortunately everything worked and the home theater is my favorite room in the house. I need to work on hanging acoustical panels on the walls and ceiling, but it sounds fine to me right now. I can also add another sub but the existing one sounds fine and creates enough bass to elicit noise complaints from upstairs already. I can also add two rear channel speakers but need to get another amp for that. If I do that upgrade I will have the amp power the two front and center speakers and connect it to the Denon via the pre-outs. The HDMI cable is run through a conduit so that I can replace it when the HDMI standard is inevitably changed again. However there is no hurry to spend more money on this project right now.
All said I spent a little over $4000 on the electrical equipment for the theater room. Not cheap compared to a TV with a soundbar, but very cheap compared to most of the home theater setups I have seen online. Looking back at the project the only thing I would have done differently would have been to run the speaker wires longer. Right now one of the runs is a little short and makes the setup in the cubby a bit cramped.
When we were building the house Kate was a bit dismissive of the theater room. She did not grow up watching TV and movies so does not share my addiction. Now that we have moved into the house she has started warming up to the benefits of having a dedicated theater room. It allows us to keep the living room free of a TV, which we both prefer. However when the mood strikes we can easily retreat downstairs and enjoy some escapism.
-

Anticipation, Expectations, and Waiting
A colleague of mine wrote about waiting for a big running race he has this weekend:
I’m always a bit uneasy and fidgety in the week leading up to a race.
Four More Days of Waiting – Jon PenlandReplace ‘a race’ with ‘moving into a new home’ and I would say uneasy and fidgety are great adjectives to use. The unease is seeing how much is left to be completed by the builders and all the little details I want to point out. At this point they have built an amazing structure that is solid, well insulated, and magnificent. Now its just the million little details of finish work that need to be done.
The fidgeting is due to anticipation and expectation. Kate and I last lived in a real house over 7 years ago. Since then we have been in a 280 square foot trailer and currently a 300 square foot cabin. Having full size bathrooms and a full size kitchen is going to be revelatory compared to the cramped quarters we are used to. Being able to have more than one person in the kitchen at the same time seems otherworldly, but we can see it coming.
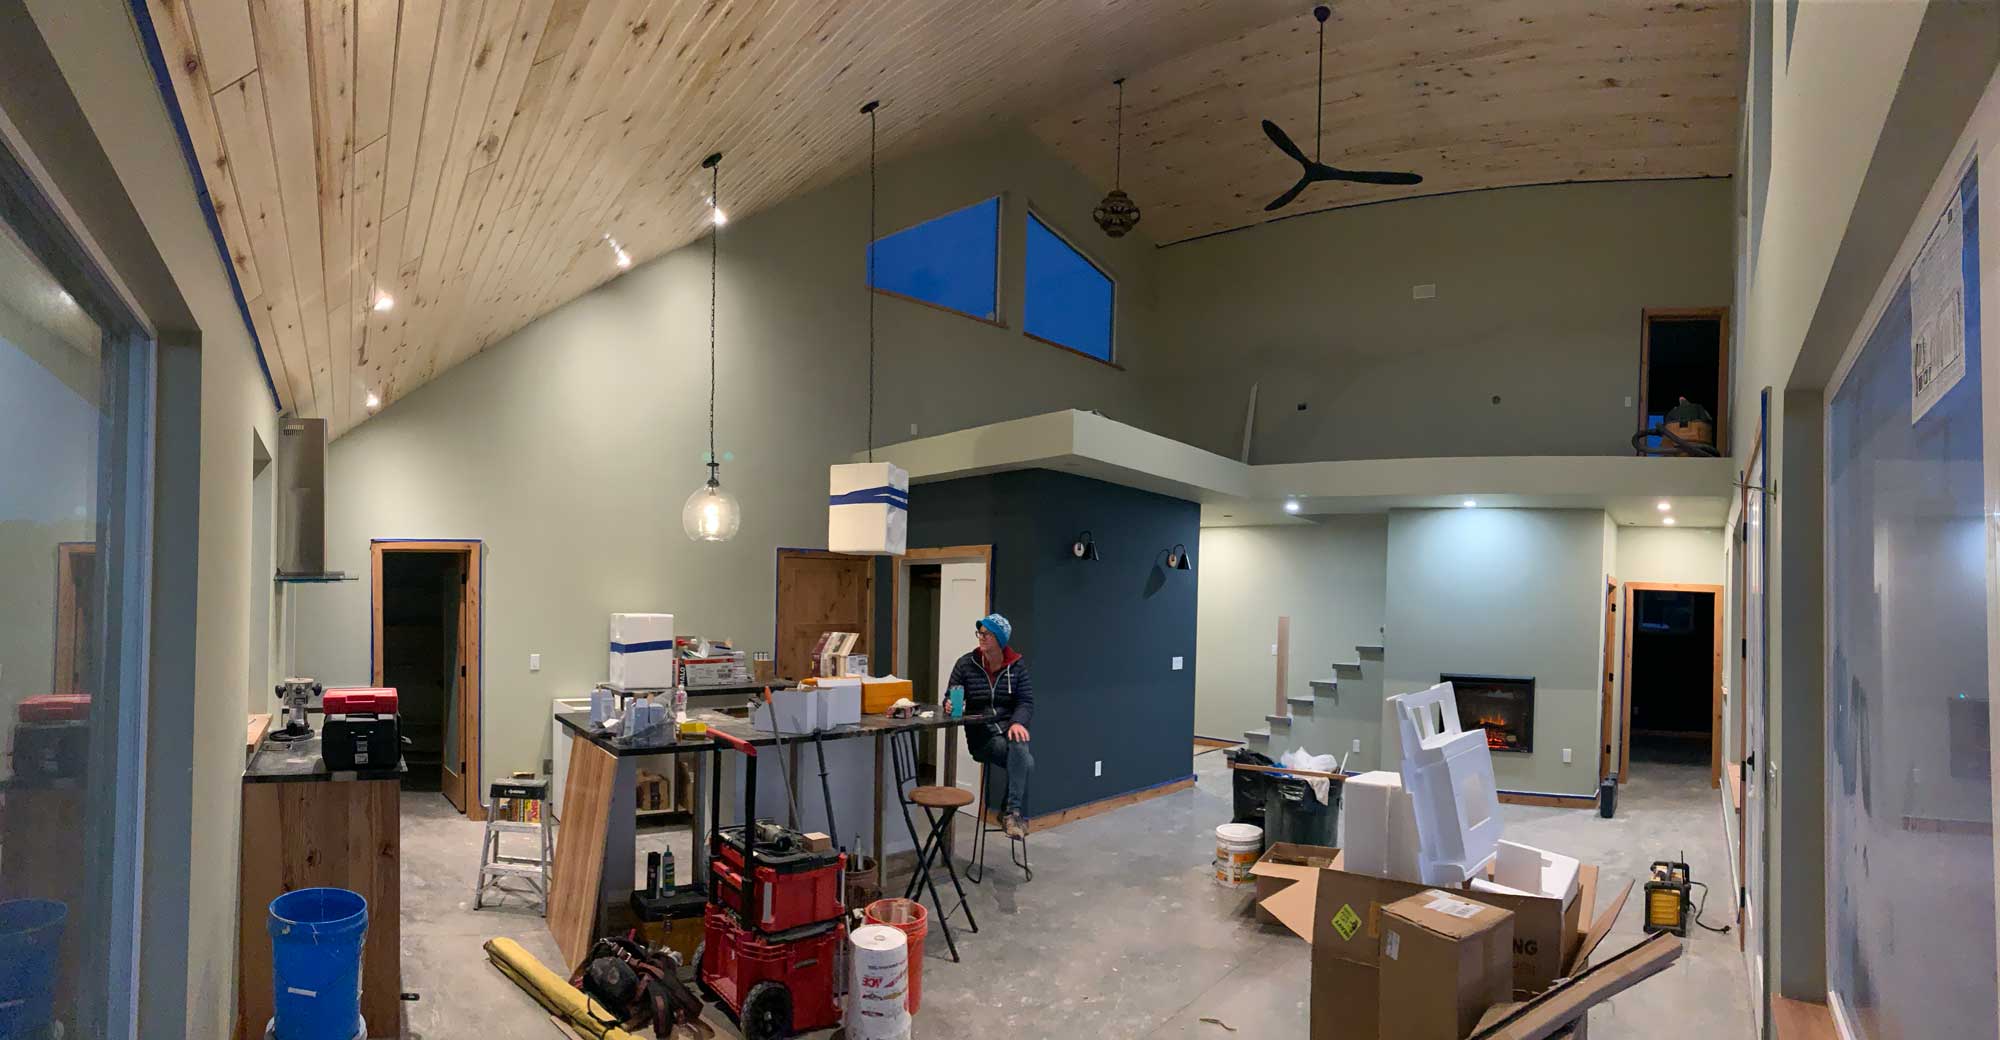
So close! We had coffee and cherry tarts in the new kitchen this morning. Sure there is a mess of dirt on the windows and paint buckets in the corners but the countertop is glorious, and gigantic compared to what we have lived with for so many years. It is already amazing and will be even better when we don’t have to walk over from the cabin to experience it.
Our expectations have had to be recalibrated a number of times. At the start of the project the builder said we would be moving in by mid September. Kate and I had a feeling that that timeline was a bit unrealistic and never really expected to be moved in by then. So when the move in date slipped to October we were not surprised. Then it slipped to early November. Which, if you are keeping score, was last weekend.
A few weeks ago I was not managing my expectations very well. Mentally I was already building the theater room and my office. I started getting lazy with my workouts in the small cabin thinking that soon I would be working out in the theater room. I was already living in the house even though we were not yet living in the house. This is also known as delusion and generally is not a good mindset to have.
As I mentioned a few days ago we started riding our bikes in the morning again and that helped a lot. I also made the leap from thinking about moving into the house to living in the house. What I mean by that is that we are planning on being in this house for the rest of our lives. Thats a long time, so what is a few weeks of waiting to move? Once I started thinking on a longer timeline my anticipation calmed a lot.
Already this week the builders have made amazing progress. The handrails for the upstairs loft are done. The showers are done and the electricians are here today to finish up and pass inspection. We are so close its awesome. In the meantime I have to remember to keep living and know that we will move in soon.
-

Put a lid on it!
The house build continues to progress. Yesterday the roofers completed the standing seam metal roof. I guess I had gotten used to seeing the green seal, which they installed back in June, because it really struck me how much better the roof looks now!

Manufacturing the roof panels on site. One of the coolest parts of the roof installation was that the roof was mostly manufactured on site. They have a trailer with rolls of sheet metal that get processed into the final shape and lengths on site. This was really neat to see in person.

Roof parts ready for installation. Once they manufactured the parts they got up on the roof and installed them. It took 3 days to get the whole roof done and it looks really great.
We went with a metal roof because we live in an area that is prone to forest fires and, for the most part, metal does not catch on fire. Also maintenance of a metal roof is pretty much zero, especially when it is a standing seam metal roof.
We spent the extra money for a standing seam roof because it will last a lot longer than other types of metal roofs. On a standing seam roof all fasteners that penetrate the roof are covered by the next panel via the standing seam. The seam clicks together and protects the fastener from the elements and the roof stays attached.
The exterior of the house it pretty much done at this point. The drywall texture is finishing up and then we start paint and then trim. The goal is currently to move in by Nov 5th. Fingers are crossed.
-
Why does a home need to be smart?
As we are designing and preparing to build a home I have begun researching smart home options. When I search wikipedia for ‘smart home’ it takes me to Home Automation. When I search the rest of the Web for ‘smart home’ I see mostly things about lighting and security cameras.
We live in a small and remote town so security isn’t really a big deal. We will have cameras setup but it will mainly be to spy on the dogs when we are away. Having some outdoor cameras will also be nice for peace of mind but its really a secondary concern.
The lighting part of things definitely looks cool but is expensive and again a secondary feature. I can see having the ability to turn lights off and on with voice control and via zones as really cool. I can also see setting them to go into ‘disco’ mode and sync with music anytime we want an impromptu dance party.
Setting up motion sensors doesn’t require a smart home configuration, but having them tied in can allow us to do more than just turn on the lights. We can automate music and window shades to play and open when we enter a room for example.
Getting a little more serious we can setup a water sensor in the mechanical room. If it detects water it can shut off the main water line automatically. That seems pretty good to have.
There are a lot of options for controlling air quality. At a basic level we can have a humidity sensor activate ventilation fans if it gets too high in the bathroom. On a more advanced level we can get a whole house ventiliation system that measures CO2 and VOC levels:
So many options for smart home setup but I think the important part to keep in mind is why before how. Why do we need a smart home? Why do we need home automation? Once we answer those questions it appears the how is already here.
-

Home building update: Pause and Hot Tub
It has been a while since I posted about our home building project. While we have been able to settle on a design we are having a challenge finding builders who can meet our budget. Apparently the pandemic has driven up the cost of materials and also everyone wants a home or add on built, right now.
Based on that we have decided to pause the build phase till spring. This will allow us more time to talk with various builders and find someone we like who can deliver at a price we want to pay. It also gives us more time to think through the details of the finished house.
Finished House Plan:

View 1 of the Garage Door and driveway is the west side, and back of the house. When you drive up our main driveway entrance you will see the house from View’s 3 and 4. We set it up that way because we want the main view of the home to be of this:

There are a on of details about the house that I will get into eventually. We are excited about the project still but we want to avoid spending all of the money building it. We have talked with more builders in the last couple of weeks and Spring is looking very promising.
Did you say Hot Tub?
In the meantime we need to prepare for winter in Colorado. That means cold and, hopefully, snow. Besides buying warm clothing the best way to deal with cold and snow is with a tub of hot water with jets, also known as a Hot Tub.
We have discussed having a Hot Tub for a few years now. Spending regular time soaking in a tub of hot water is great for soreness and heart health. Its also nice to spend time in a hot bath for relaxing. The problem is that Hot Tubs can be really expensive, especially when they are new.
So Kate fired up Craigslist and started searching for used Hot Tubs. There were a few that seemed ok but something just wasn’t right. So she kept looking and looking.
At the same time I started researching how to properly setup a Hot Tub. After watching a few YouTube videos and reading some websites it came down to building a concrete, gravel, or wood pad to place the tub on. Since this setup is temporary until we build the house we opted for gravel. Its the cheapest option and won’t stand out as much when there is nothing on it.
For location we decided on the south west corner of the cabin’s gravel patio. It would be close to a water spigot, close to the french doors of the cabin, and in direct sunlight.

Then at 10pm on a Wednesday night Kate found The Tub. They were asking almost nothing so we were suspicious. Then Kate talked with her and got the story: They had purchased the house a few years ago and the tub came with the house. They were not Hot Tub people and never used it. She wanted the corner of her porch back and the tub had to go.
The problem was that this tub was just over 4 hours away, and we would need to rent or borrow a trailer to bring it back. We also needed an electrician to setup the 240V connection cause I am not quite ready to play with 240 just yet.
Again Kate came to the rescue and found a hot tub delivery guy who is also an electrician. He agreed to pick the tub up, give it a quick inspection, deliver it to us, and connect the electrical. The catch was that I was going to need to get the hottub pad setup in just a few days.
So we had a pile of roadbase gravel delivered and I got to work:
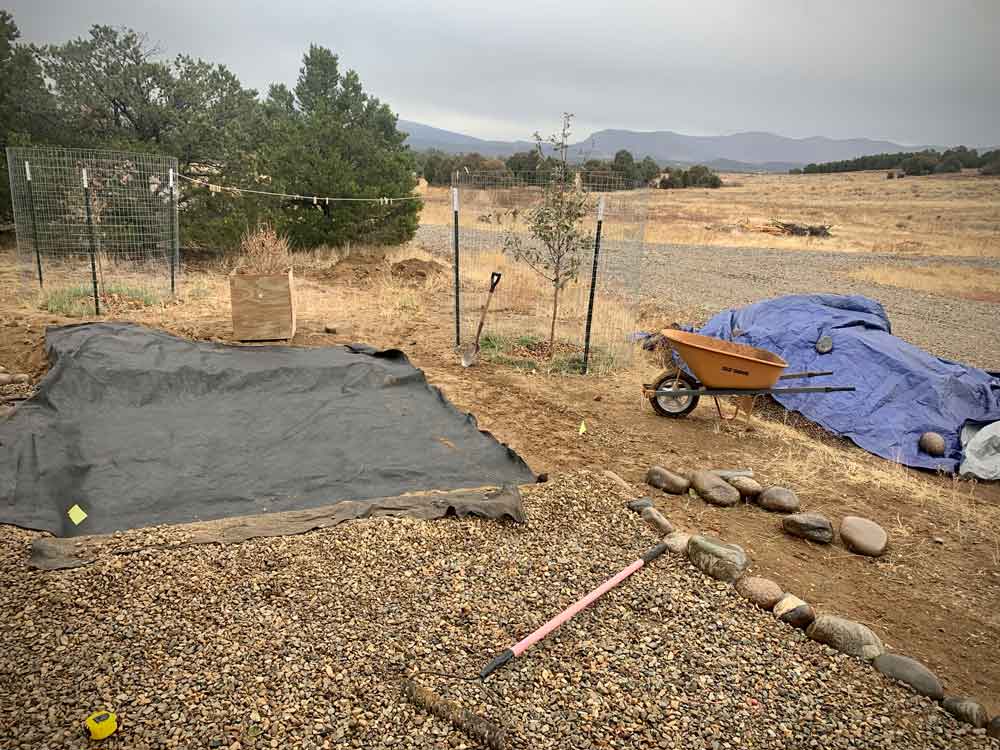
This is the site of the pad before I added the roadbase gravel. I dug out 6 inches on the high side, left side here, and then placed landscaping fabric down to prevent weeds from coming up. Then I started wheelbarrowing the gravel under the blue tarp on to the fabric. The process of laying down the gravel and then tamping it down took some time. However this part of the process results in the foundation that the hottub would sit on. So I took my time and got it tamped down really well so that we wouldn’t have a tub slide incident. The timing was perfect because right as I finished the hotub arrived and I helped get it into position:
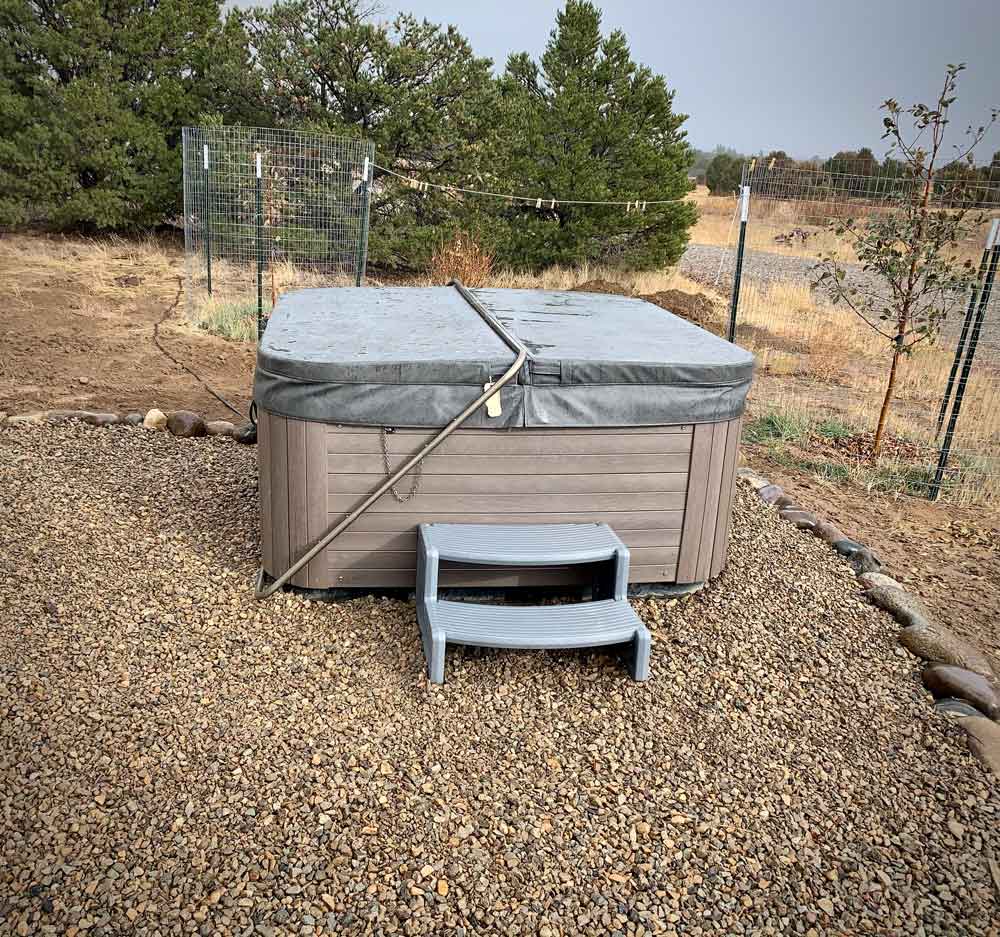
Once the tub was in place I raked he clean gravel back over the pad to make things look nice. Then we filled the tub up and turned it on. With 240V electricity the water heats up about 10℉ and hour. If we had gone with 120V it heats up 1℉ and hour. So we waited a few hours and then started what I am pretty sure will be a lifetime addiction to hottubs:

Here is another shot of the setup:

So far I have used the tub everyday before and after work. Its part of my new routine and is a great way to prepare for a day of work and then unwind when done. As an added bonus we have been watching the stars at night a lot more. We just sit back, turn the lights off, and ponder our purpose in the Universe. Oh and we can see Starlink satellites traversing the night sky.
Maintaining the hotub water is my new past time. It is a lot easier than a pool cause there is a lot less water. The hottub delivery guy gave us some good tips too: focus on chlorine, shock, and pH. So far so good as the water is clear and not overly chlorinated.
I had a house with a pool years ago in Phoenix. It was a lot of work and I wasn’t that into using it as I had thought. A hotub is great for a 15 to 30 minute soak and serves a much more therapeutic purpose: mentally and physically. I am sold, if you cannot tell.