Tag: solar

  • Solar Powered

    Solar Powered

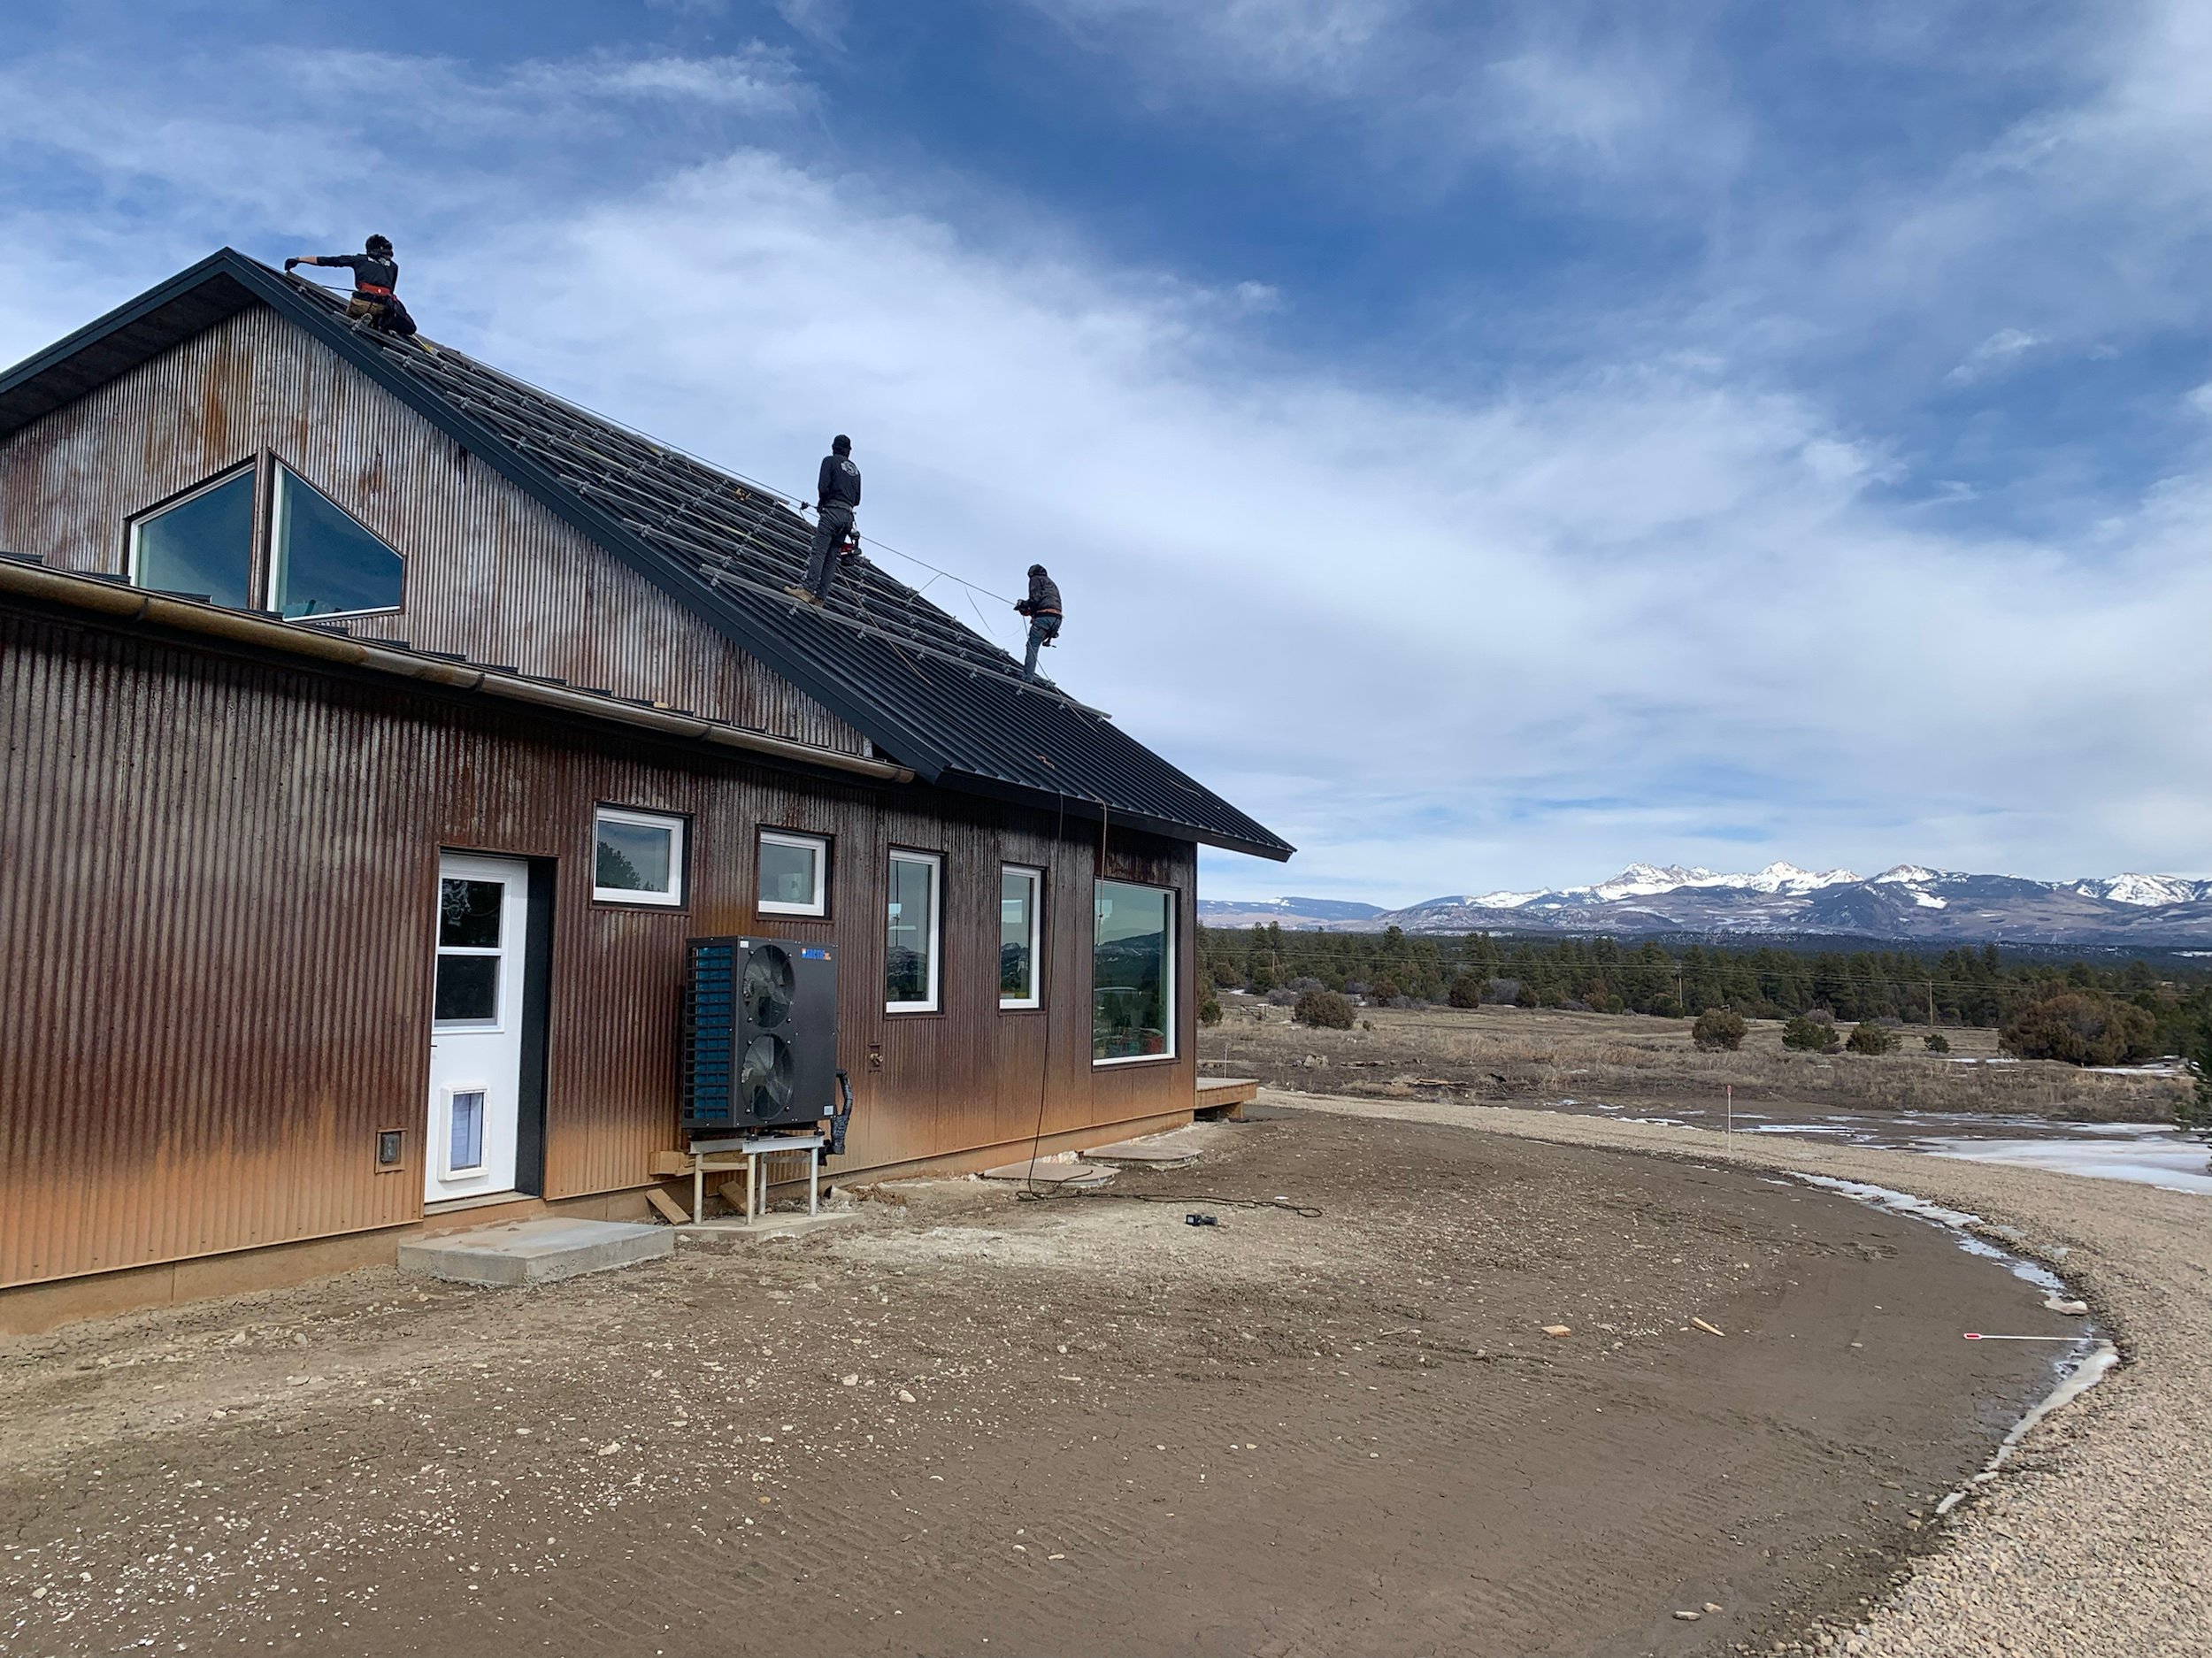
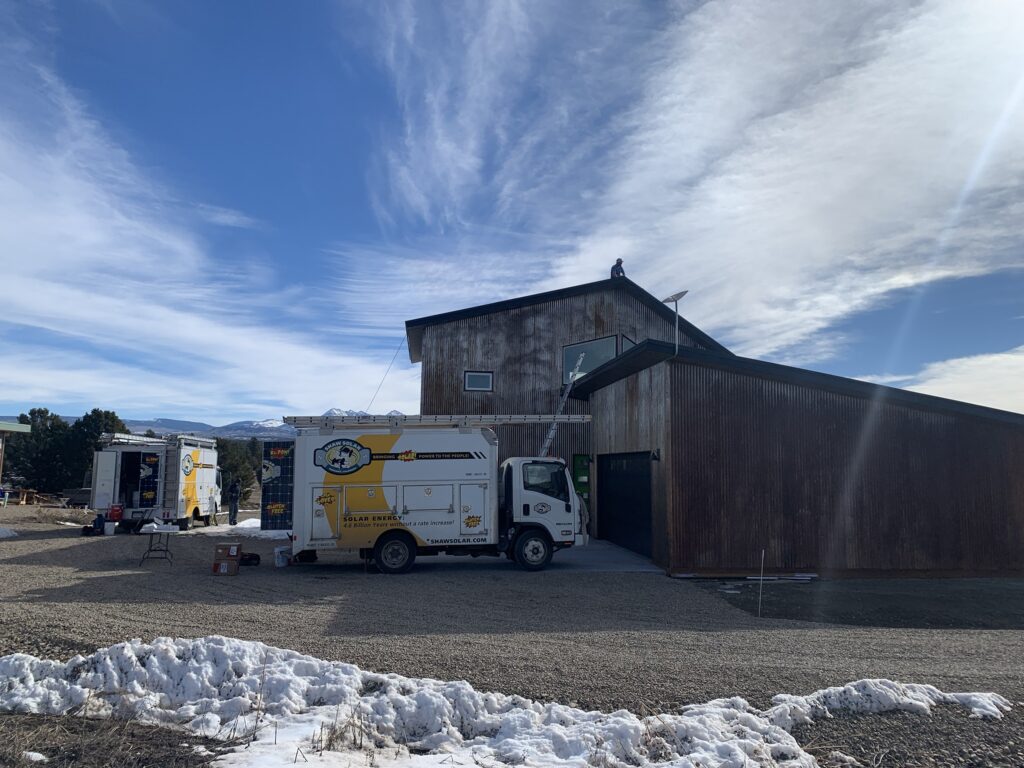
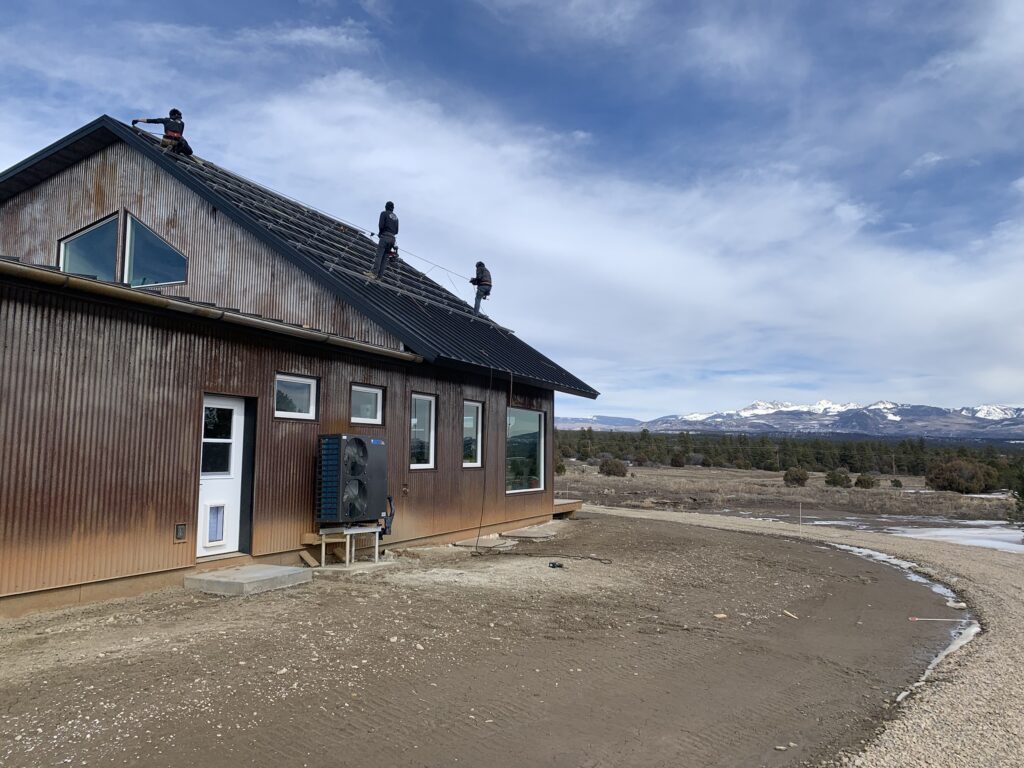
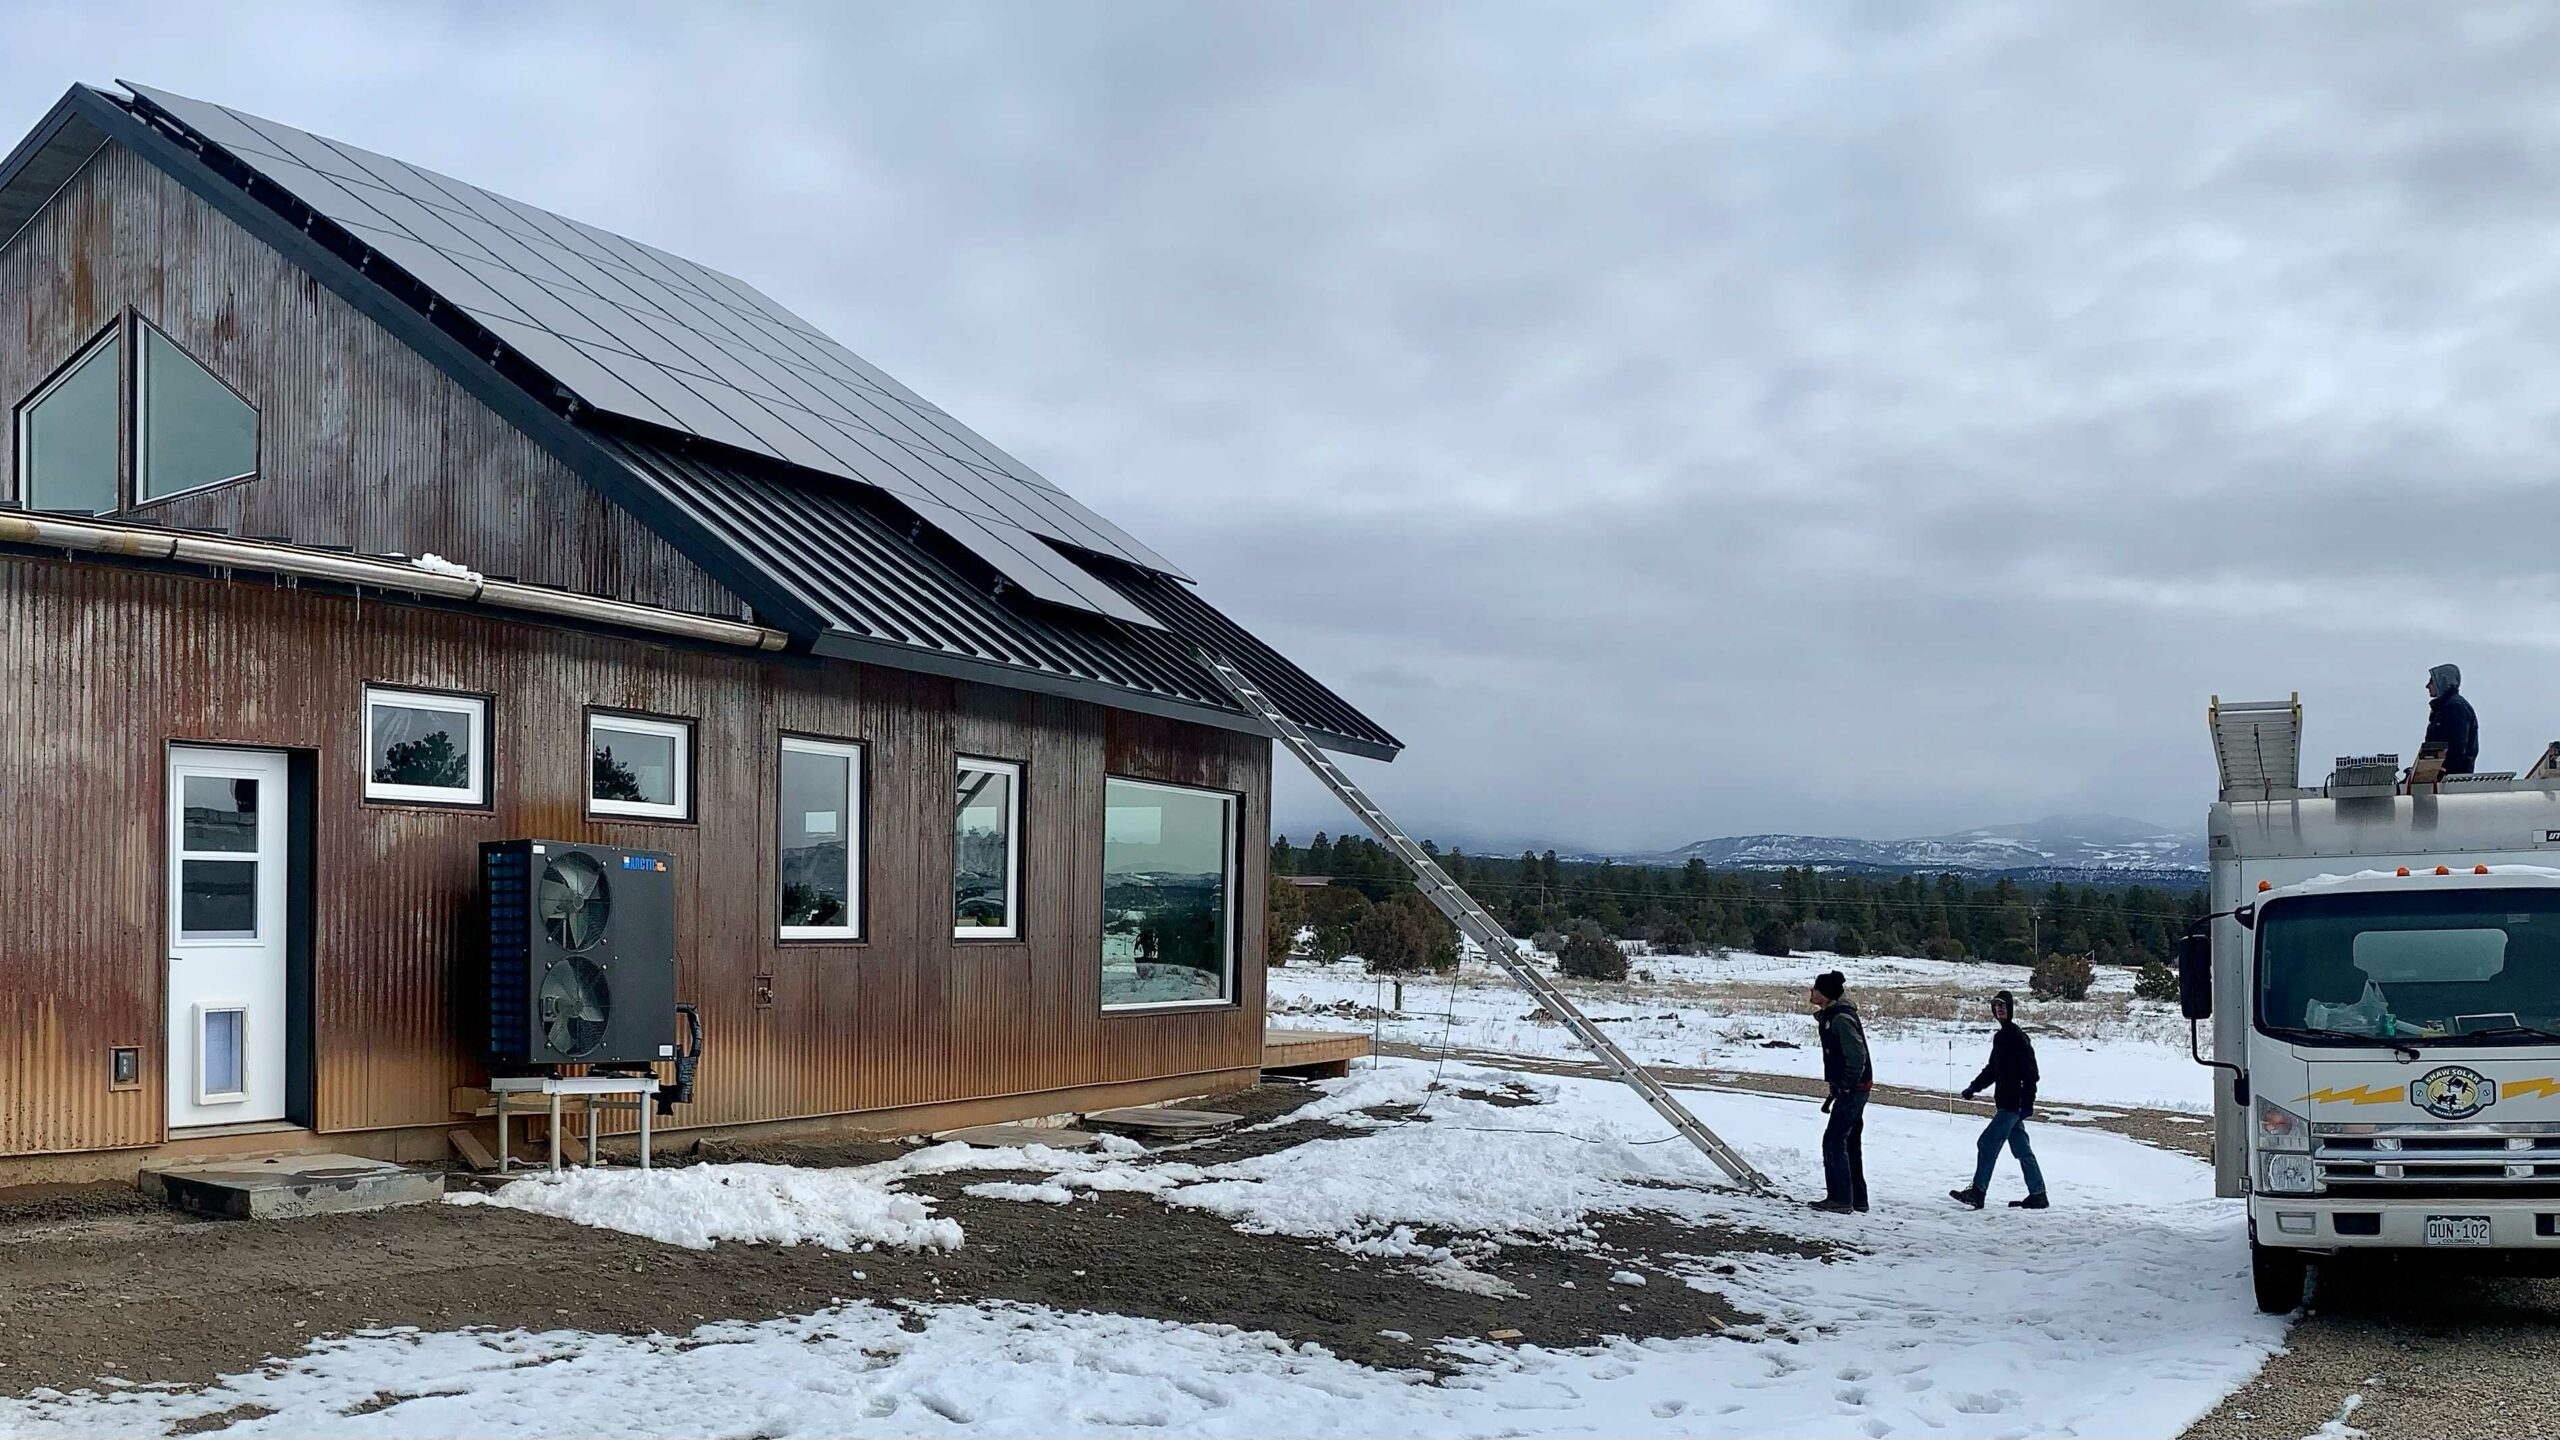
    The solar install was completed today, for the most part. The install is done and working. Now we have to wait on the State of Colorado electrical inspector and then our power utility inspector. That should take less than 2 weeks and then we will be putting juice back onto the grid and eliminating our homes power bill.

    The main issue preventing solar power adoption is the large up front cost. The payoff for our system is estimated to be ten years. Thats with no increase in utility rates. When we added solar to our home in Phoenix it paid for itself in five years. Solar works and everyone who owns their home should seriously consider getting it.

    Currently there are a lot of tax rebates available but those are in the process of being phased out. The US Federal tax credit for renewable energy purchases is currently set to 26% for 2022. It drops to 23% in 2023 and expires in 2024 unless congress extends it, again. When we did our home in Phoenix it was a 30% credit and people still complained it wasn’t enough.

    Your state and utility company may also have additional credits available. You should do some research and even call the utility company to learn more. This is also a good idea to check on if you are buying any energy efficient equipment. The incentives are there to make this improvements, you just need to find out about them.

    Once you determine that getting solar on your home makes sense you should start looking for companies that specialize in solar installation. You want to be wary of any company that pushes leasing the system though. Leasing a solar system on your home is a terrible idea.

    When you lease solar you are putting equipment on your roof that you do not own. You avoid the large upfront cost and just have a monthly payment to make. You save some money on your electric bill and sleep knowing you are helping to reduce the use of fossil fuels. The problem comes if you need to sell your home.

    Ideally the buyer accepts your lease for the solar equipment and everyone is happy. Unfortunately ideally does not happen the majority of the time and you have to pay to remove the system. You also have to pay an early termination fee for breaking the lease. In the end if you don’t have the ability to pay for the system up front you should reconsider getting it until you can pay for it.

    Past the leasing debacle you want to make sure that the company you hire has its own master electrician on staff. A lot of installers hire a master electrician as a subcontractor for the installations. The majority of the install is putting the racking and panels on the roof. The electrician doesn’t have a lot to do but they do have the most important part of the job. If the company has one on staff they are less likely to have delays. Also if and or when there is an issue the company will be faster to send the electrician back out.

    When you talk with the companies to get quotes they should absolutely come out to see your property. They should check for trees or other shade creating objects that will cause issues with solar production. They should check for access to your electrical panel and also that it is big enough for them to add more circuits. For our home in Phoenix we needed to get a larger panel.

    They should ask to take a look at your prior 12 months of electrical usage. If you don’t have 12 months, like us, then they should ask for a list of all electrical devices in the home. They should also get details about insulation values. Then they can create a simulation of annual usage.

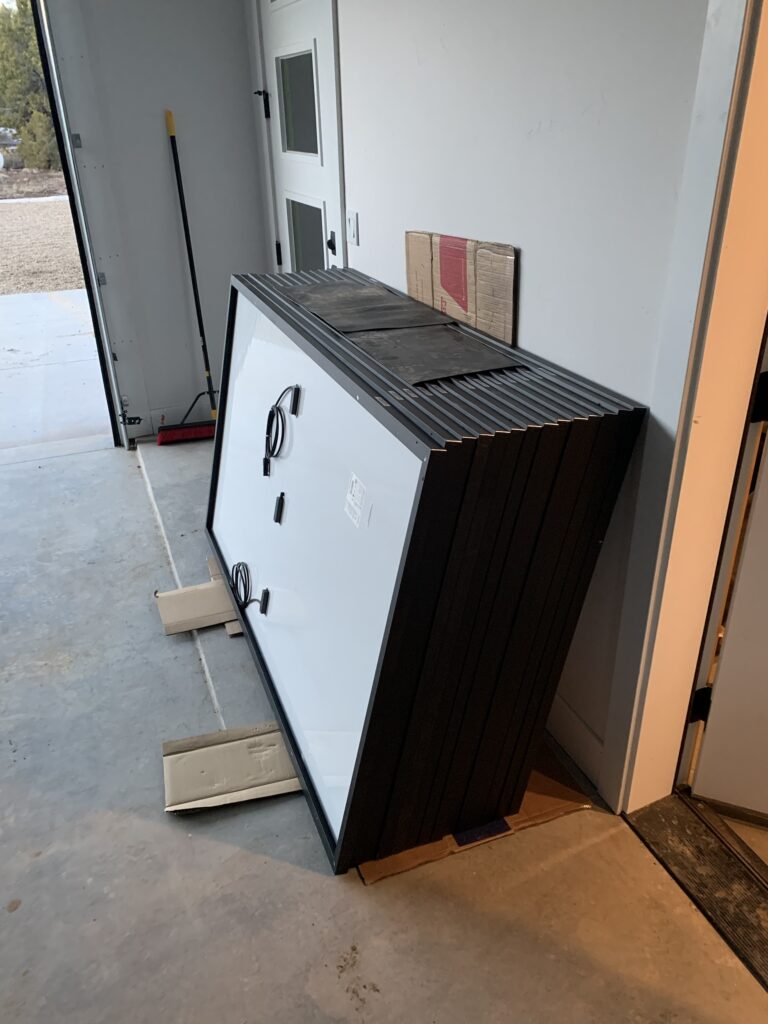
    From the annual usage they will be able to determine the size of your system. When I did some math on this last year before the build even began I came up with us needing a 16kW system. That included us having an Electric Vehicle and charging it at home. We do not have an EV yet so the installers estimate of a 12kW system makes sense, we hope.

    Understanding the technical aspects of your solar system can be helpful. It’s a good idea to have a general understanding of how the system works and how it will be installed. The installation company should take time to go over these details with you in their quote. You should also expect them to handle coordinating with your utility company and they should have a good relationship with the utility company.

    The quote should be clear and easy to understand. They should have the total price at the top. That is the number you are going to need to pay over the course of the install. There will be an upfront deposit, then another payment once the install is done, and a final payment once the utility signs off and lets you create juice. Don’t count on the rebates coming in during the project. Be able to pay and keep feeding your family otherwise wait till you can.

    The quote should list out the details of the equipment they are selling you and all the steps they are handling, like talking with the utility company. It should also show you the payment details and finally the installation process. Get a few quotes.

    The coolest thing about having solar on your home is that the home will always be able to pay its electric bill. Once you install the system the warranties are over 20 years for pretty much all of the equipment and since there are no moving parts they just work. Just do it.

  • Getting solar installed

    Getting solar installed

    One thing we designed our home to have is a large south facing steep roof. This gives us a perfect platform to install solar panels. The initial plan is to have them tied to the grid to offset our electrical usage. This saves us all of the money we pay for power and helps reduce the need for coal powered electrical generation.

    They got cool trucks.

    Today the solar installation crew showed up and got to work. They got all of the roof racking installed and most of the inverter and electrical wiring. On Monday they will be back to complete the panel install.

    Rack em up!
    14 of the 34 panels

    Once that is done we have to wait a week for the state inspector to approve the install. Then the electric company will come by to check everything is connected to the grid correctly. Then we will be live.

  • Building a forever home – 3/100

    Building a forever home – 3/100

    Kate and I moved into our new home almost 3 weeks ago. Awesome is the word that sums up the entire situation. We designed the home to be exactly what we wanted based on a few criteria: It will be our forever home, we wanted to highlight the views of the La Plata mountain range to the east, it should be highly efficient and follow Passive House design concepts, and we need to be able to work full time here.

    Forever Home

    How can we say that this is our forever home? We cannot but we went into the project with that mindset. We are not trying to build something that we flip in a few years and then move onto the next project. Instead we want to have a home that we can see ourselves aging into in various ways. The first design that this influenced is the guest bedroom.

    2020 made a lot of realities hit really hard. The idea that we will always be in good health and fully capable is much more fragile now. When we thought of our parents the reality felt even more immediate. This caused us to think of the guest bedroom as a place that needed to accommodate someone in almost any condition. So it follows the American’s with Disabilities Act (ADA) guidelines for making a bedroom and bathroom accessible. There is at least 30 inches of clearance throughout the room. The doors are 36 inch pocket doors which are easier to handle from a wheelchair. We have also added extra blocking in the walls around the shower and toilet for pull bars.

    We also built the guest bedroom with the same dimensions as our master bed upstairs. If at somepoint we get tired of climbing the stairs, we can move into the guest room on the main floor. It still has a great view of the mountains too.

    The kitchen was designed so that multiple people can operate in there at the same time without causing conflict. We put plenty of walking space between the counters and built a large pantry so someone can even work in there. We did not follow ADA guidelines with the countertop heights. Kate is 5’8″ and I am 6’2″ and most countertops are too low for us to work at comfortably. We had them built at 39.5 inches, about 3 inches taller than normal.

    Finally we wanted a home where we could host guests and have other people enjoy themselves. For this we have multiple guest rooms and plenty of restrooms. The dining room and living room allow us to bring a lot of people together and connect.

    Views of the La Platas

    One of the first things we recognized about this land when we bought it was the views of the La Plata mountain range to the east. We knew we wanted to see them from the new house but Kate took it to another level. We have 11 windows on the east side of the house, each giving us a different way of viewing the mountains.

    There is a lot of exposure to the morning sun which helps wake the house up really quickly. We built the eave of the eastern roof long enough to provide shade to these windows as the sun rises higher during the day. This should help prevent too much solar gain, and overheat the home. We will probably need to add some type of window coverings in summer, but right now in winter the solar gain is very nice.

    Passive House Design

    When we started designing and researching how to build our home we learned about the Passive Home(PH) design concept. In a nutshell PH design focuses on using as little energy to heat, cool, and power a building, and sealing the home tightly so that it does not lose the conditioned air.

    As we learned more about PH design we quickly realized that we were going to want to work with someone familiar with the concept. We weren’t necessarily interested in spending the money to be PH certified, but we still wanted to follow the concepts and practices involved. This was also the main reason we reached out to the builder who would eventually become our builder, they had build a number of PH homes and were well versed in the concepts.

    Since the home would be sealed very tight it needed a ventilation system, so that we get fresh air in the home. The solution to this issue is installing a Heating Recovery Ventilator(HRV) or Energy Recovery Ventilator(ERV) system. These systems pull air from places like bathrooms, the kitchen, and mudroom and sends fresh air into the bedrooms and living spaces. In the mid point of the system lies an exchanger that pulls heat from the exhaust air and adds it to the incoming fresh air. The difference between and HRV and ERV is that the ERV also pulls moisture to help keep humidity at a constant level.

    In addition to saving energy by keeping the heated air in the home these systems are designed to run on very little power. This helps keep the overall PH design principles in mind.

    We went with an ERV system since we live in a dry climate and want to keep as much moisture as possible. If you ask 9 people who work with HRV and ERV systems which one you should use, based on your climate, you will probably get 11 different answers.

    We will also have solar photovoltaic panels added to our southern facing roof. This will be grid tied and offset all of our power usage and then some. Eventually we will end up with an electric vehicle and have wiring setup for a Level 3 charger in the garage.

    Full Time Workspaces

    Kate and I both work remotely for our jobs. We needed spaces that allow us to focus and be on calls without interrupting each other. We knew early on that Kate would be using the Loft as her Loftice. It has all the views she wanted but is still a separate space from the main living area. Personally I do not like having natural light when I am working on my computer. So part of the purpose in building a basement was for my office.

    For internet we use Starlink since we are in a remote rural area. There are other options, but Starlink is far and away the fastest and most reliable connection. Dishy is mounted on the NorthWest corner of the Garage roof. This gives it plenty of sky with zero obstructions, and makes it easier to access versus putting it two floors up on the main roof.

    Dishy’s PoE Cat 6 cable runs through the garage attic to a centrally located closet by the Kitchen. From there we have Wifi to the above ground parts of the house, and a switch that carries Cat 6 to both offices and the theater room. A second Wifi Access Point is in the basement to give better signal down there. So far everything is great with all areas of the house getting full Starlink speeds wirelessly.

    How’d we do?

    Overall the builders hit all of the marks that we wanted, and we are enjoying our home immensely. We are incredibly fortunate to have been able to do this at any time in our lives. When we hit the road full time 7 years ago this was not on the roadmap, but things change and here we are. I cannot say if we will live here forever but right now I feel like we could.

  • Concrete waits for no man : 52/100

    Concrete waits for no man : 52/100

    Today we had some gentlemen come and pour concrete into the giant hole we dug yesterday. You may recall that we had to dig a 24 inch wide hole 58 inches deep to the pole that will hold our solar panel array. The problem is that the amount of concrete needed to fill a hole that size requires mixing 26 80-lb bags of concrete. The solution is that Kate found some concrete ninjas who do this regularly.

    Form it up Chris!

    I once worked construction with a guy who said: “Concrete waits for no man.” What this means is that concrete is a force of nature and does not negotiate. Once you get concrete wet a timer starts. If you don’t have the concrete where you want it to be when that timer goes off, then too bad.

    The concrete ninjas showed up on time with the bags of concrete and their mixer. Within 45 minutes they were headed home, the hole was full, and the work space was clean. They had a perfect system setup with an open bag on the tailgate. One guy would grab the bag, turn around, and pour it into the mixer. That is the best way to have to handle an 80 lb bag. I would have not been that smart.

    Once they had 7 bags poured in the mixer was full for that load. They would get the water ratio right and add some pure cement to increase the strength. Once everything was set they just rotated the mixer 190 degrees and everything poured into the hole. They did 4 loads and were done.

    Concrete ninjas getting shit done!

    Manuel recommended that we let the pole sit for a week before putting the solar panels on top. By then the concrete will be halfway cured. It will take a month until it fully cures.

    Now that the pole is up we will begin working on connecting the wiring from the pole to the solar charge controller in the cabin. Then we will be able to hook everything up and have 12v and 120v electricity in the cabin! This week we will spend time finishing the inside wiring and pull wire to my shed/workshop/man cave.

    Workout detail

    Looking for that tailwind!

    I dug trail for an hour then the 3 of us went on a 26 mile bike ride. We went north west into the wind. We stopped halfway in the town of Dolores and had some snacks at the local grocer. It was a beautiful day and the ride felt great.

  • Auger : 51/100

    Auger : 51/100

    One thing I briefly mentioned in my post about Solar Panels is that we are mounting them on a pole. We are doing this because we have a flat roof on the cabin that we may eventually build a deck on. Additionally since it is a flat roof the snow will accumulate and block the panels in the winter. A top of pole mount allows us to leave the roof clear, avoid having snow block the panels, and have the ability to adjust the angle of the panels seasonally.

    When searching for top of pole solar mounts I learned a few things:

    1. They are on the pricey side considering there is no electronics involved.
    2. Wind is the biggest thing to be worried about but snowload is also a concern.
    3. The pole used is big heavy and requires a really large hole.

    The price is what it is and we ended up with a good deal.

    The wind in our area is not too bad. We do not get tornado’s, yet, so nothing special needs to be done. The snowload for our area is on the bubble for the mount we purchased.

    Top of pole solar mounts do not come with a pole. That is because they require a very large steel pole that would be really expensive to deliver. Instead we had to make a trip to a local steel shop to buy a 12′ 4″ 40 series steel pipe. Its big and heavy.

    Next the mount manufacturer informed us that the pole needs to be set in a 58 inch deep 24 inch wide hole. Digging a hole that big by hand would be a difficult job. In our case digging that hole by hand is pretty much impossible because our soil is clay and compacted.

    To dig this hole we need a mechanical auger. A 24 inch auger:

    Getting Started
    Progress
    Done
    Left boot for scale. Don’t want to fall in that hole.

    The hole now needs to be filled with concrete. The volume of concrete needed for a hole that size is about 2/3’s of a yard of concrete. That’s about 26 80-lb bags of concrete. Fortunately we found someone who can handle a load that size and are hoping to have it cemented in tomorrow.

    The plan is to have the panels mounted and connected this week. Very exciting.

    Workout detail

    The wiring from the panels to the cabin are going to be buried. I dug the trench for that today. I am very tired now. Good night.

  • Halfway : 50/100

    Holy moly we are halfway through the 100 days of blogging challenge! In some ways it feels like the time has flown by but I remember days where I scrambled to come up with something to write about. Also we are only halfway there so who knows what might happen.

    What I do know is that this is the most consistent I have written for a long time. Probably since University or even longer. It has been great practice to sit here at the end of each day and spend time reflecting.

    Part of this challenge was also to help distract me from the pandemonium that is the US today. Not only does writing about positive things help me stay positive. Spending time writing also means I have less time to read the news. There is only so much news that I need in a day to stay on top of things.

    This blog started off focused on my cycling. It has progressed into being more about what is happening in my life in general. The cabin project is coming along. We almost have the solar finished. The wiring is pretty much done and we are digging the hole for the pole that the solar array sits on tomorrow. The trail building has grown into a new hobby for me and I am enjoying talking about it. Kate and I are designing a house so I will definitely start writing more about that process.

    I am sure more will come up and I hope you stick around and keep reading.

    Workout detail

    Spent an hour trail building this morning.

  • Solar Panels : 46/100

    This is the 4th part of a multi part series covering the solar energy system we are building in our cabin. The 1st part discussed grid tie vs off grid systems. We are going to be off grid. The second part talked about AC vs DC and how an off grid system has to have at least DC because of the batteries. The third part covered batteries which we are going with AGM’s with 832 amp hours of power.

    Today we are going to talk about solar panels, also knows as PV or photovoltaic panels. PV panels collect energy from the sun and convert it into electricity. When you think of solar electricity the panels are the first image that come to mind.

    The cost of solar panels dropped significantly over the last 10 years. Kate and I added PV to our home in Phoenix in 2012. The renters haven’t paid a single electricity bill in 6 years. I haven’t priced our system again but I imagine its about 20% to 50% cheaper to do it now.

    When it comes to solar panels there is a lot to consider. Watts generated, size, efficiency, and more. To me the panel is the least complicated item in the entire system. I want to set them up and never think about them again.

    In this case since we have 832 amp hours of batteries to recharge we went with four 320 watt panels. This should be a little more solar panel than we need based on usage but its better to have too much than too little. For a cost comparison the solar panels all together cost about 30% of what the batteries cost.

    We will mount the panels for the cabin on a top of pole mount. This is because we want to keep the roof clear for a possible future roof deck.

    Workout details

    I did not manage to get up at 7am and get my workout in. There was a decent amount of smoke in the air from the nearby fires so I used that as part of my excuse. I have walked a little tonight and am going to get another lap in now.

  • Batteries : 45/100

    Batteries : 45/100

    Featured image is of the smoke from the East Canyon forest fire. It started around 1pm and is about 10 miles from us. We are not in any immediate danger except the smoke may blow our direction and be annoying. Welcome to Colorado in a dry summer.

    Solar

    Yesterday I did the second part of a multiple part series about building an off grid solar system for our cabin. The first part was about the differences of a grid tie system vs off grid. The second part was about AC vs DC. In this part we are talking about batteries.

    Batteries are the most important part of an off grid system. You can have solar panels, a solar charge controller, an inverter, but if you don’t have batteries nothing else happens. The biggest surprise is that lithium ion is not necessarily the best option.

    Electric batteries have been around since 1800 but we want batteries that can be recharged. The earliest rechargeable batteries were lead-acid, invented in 1859. Today rechargeable batteries are mostly associated with Lithium-Ion type batteries.

    When choosing a battery for powering a home there are a few factors to consider:

    1. Cost
    2. Voltage
    3. Amp Hours
    4. Maintenance

    1) Cost is always the first thing to consider when buying batteries. On the cheap end you can get Marine Deep Charge batteries from your local auto store. On the expensive end you are looking at Lithium. In the middle you have flooded lead acid and absorbed glass mat(AGM).

    You want to spend a little more on batteries than the cheapest so that they last longer. The lead acid batteries we bought for the trailer were a little more but have lasted for six years at the point.

    2) Voltage is important because that determines how your DC system runs. Recall from the last part of this series that DC electricity is the only type of electricity that can be stored in batteries. So by default when you have batteries you have a DC system.

    Most DC systems are 12 volts as are most rechargeable batteries. However the longer lasting lead-acid based batteries come in 6 volt packages. This means we have to connect our batteries in series bring the voltage up to 12.

    3) When you are talking about a batteries capacity, amp hours give you a way of comparing batteries. On the set of batteries that we chose for the cabin the amp hours are 416ah @ 20 hour rate. This means that they battery will deliver 20 amps of power over the course of 20 hours.

    We are going big with this system though and are going to double it. We will get 4 of those batteries and tie them into 2 pairs in serial for 12 volts. Then we will connect those 2 pair in parallel to double the amp hours to 832 amp hours. The main goal here will be to run an electric refrigerator 24/7 in the cabin.

    4) Maintenance is an important aspect of having deep state rechargeable batteries. If you take care of your batteries then they will last longer.

    With flooded lead acid batteries, like what we have on the trailer, you have to check the water levels of the batteries at least once a month. If the water level gets too low, due to evaporation cause by usage of the batteries, the lead plates will corrode and stop working. AGM batteries do not have this issue as they are sealed.

    The other maintenance of a battery is making sure it doesn’t run out of juice. Not only is it annoying when the power outage causes the lights to go out, but it is also damaging to the batteries to let them get too low.

    The depth of discharge is usually defined as a percentage of how much of the battery’s capacity has been used. For lead-acid type batteries the depth of discharge that you should never go below is 50%. Ideally you want to avoid going below 80% if you want them to last the longest.

    That is correct, with lead acid batteries you are only getting half of the listed amp hours. Keep in mind that using them that much will make them last half as long as only using 20% of them.

    Lithium Ion batteries have an almost 100% usable capacity with no ill effects for taking them down almost to 0%. You want to avoid completely draining them but even then it does not damage the battery.

    This is an area where lithium ion batteries are on a different level of performance. The problem is that they are over twice as expensive and the technology is not nearly as proven.

    For the cabin we chose AGM batteries for cost, and maintenance. We are getting more and spending less than with lithium.

    Workout Details

    We went on a beautiful ride around Mancos today. 22 miles in total.

  • AC vs DC : 44/100

    A few posts back I talked about solar for our cabin. That was the start of a multi part series about how we designed the system and then may have parts of the installation of the system.

    In the first part I talked about Grid Tie vs Off Grid and some of the ins and outs of the two types of solar systems. In this part I will talk a little about AC vs DC and why with off grid solar we need to have both.

    AC stands for Alternating Current and it is how electricity comes from most wall outlets. AC power can be transmitted across long distances with little power lost. However it cannot be stored.

    DC stands for Direct Current and it is how electricity is delivered from a battery. This means that in an off grid system you will at least have to deal with DC. This is fine for many electrical items: lights, charging phones, and anything with a USB cable.

    Unfortunately we live in an AC world. For example while laptops run on DC batteries, their chargers only work off of AC outlets. So if you want to charge your laptop you will need AC power. Same goes for all modern appliances: blenders, toasters, instant pots, air fryers, etc.

    In order to generate AC power from DC power you use an inverter. An inverter converts DC power into AC power with some power lost in the process. This means that AC power drains the batteries even faster than DC.

    Inverters come in a variety of shapes and sizes. The basics that you need to consider are: pure sine wave and amount of watts. You want to get a pure sine wave inverter. Period. Modern electronics will emit a high pitch tone with any other types. The amount of watts is determined by your most powerful appliance in terms of watts. In our case that is our Vitamix blender. It tops out at 1800 watts so we went with a 2000 watt inverter. However I noticed that the 3000 watt inverter was only $75 more and we grabbed that up.

    DC comes in a variety of voltages. 12volt is the most common and is what we use. In the next episode of the solar system series we will talk about batteries and why we ended up with what we did.

    Workout details

    Today was a day of errands. We drove to my mom’s and picked up a washing machine. This is the first washing machine we have owned in 6 years. It had to run off the generator for its first run but it did great. All this is to say that I did not get much exercise in except for lifting a washing machine a few times.

  • Hangin Drywall : 30/100

    Hangin Drywall : 30/100

    We built a 320 sq ft cabin 2 years ago. It started life as a guest restroom/bath-house but quickly evolved into a larger structure. Last year the windows and insulation were finished. This year we are adding solar power which means we need to finish the drywall. This weekend Kate’s dad and I are hanging, taping, and mudding the drywall.

    Today we hung the ceiling and half of the walls. We rented a drywall lift to make hanging the ceiling almost easy. If you ever need to drywall a ceiling be sure to rent a lift.

    Workout details

    I hung drywall. Now my back is sad.