We have had our Roomba, we named it George, for a couple of months now and for the most part it is great. Neither Kate nor I are what you might call neat freaks. We are getting better about putting things away and having specific places for things to go, but we don’t obsess about cleaning.
We have setup a schedule for George to run Mon, Wed, and Fri at 9am. This time works fine for us as we are generally working at our desks and George is only cleaning the main floor. I can hear them banging around upstairs but for the most part the noise fades into the background.
We have learned to make a few adjustments to the room when George is operating, namely we put the bar stools on one of the dinning room benches. The stools have metal rods for legs which curve at the bottom, run parallel to each other on the floor, and then curve back up to the seat. The size of the rods are just small enough for George to drive over, and in many cases get high centered and stuck. It’s funny to watch until you realize it could cause damage to itself. So we do the bar stool dance.
The bigger adjustment we have made is with the minimum viable height of the furniture on the main floor. George, and most Roomba’s, are about 3 inches tall but there is an Infra Red(IR) sensor on the front that sticks up another half inch. So the height is 3.5 inches. In order for George to maneuver under the sofa and chairs their height needs to be more than 3.5 inches.
This was an immediate issue with the sofa. The height of the bottom of the sofa was close to 4 inches but this sofa has two spring bars that curve down under the 3.5 inch minimum viable height. They curve so low that if George rolls under them just right they get stuck.
After fishing George from under the couch a few times Kate found some sofa replacement feet. These would be a few inches taller than the existing feet and raise the sofa up more than enough to achieve the minimum viable height. Hooray, problem solved!
Almost, this morning I get a message from George that they were experiencing an error. After a short search I discovered them stuck under a chair. I guess we need to raise the chair up a few inches.
These are clearly serious first world problems. 🤦🏽♂️
I have always enjoyed watching movies and TV. I enjoy all kinds of shows and use Youtube extensively for educational and entertainment purposes. I am not a hard core fan of anything but I do enjoy watching moving pictures. I enjoy going to the theater but it can be annoying when people want to talk during a show. Also with the pandemic theaters are now a no go for me.
When we started designing our home I knew I wanted a basement with a home theater. I knew that Kate would be smart and get us a place to sleep and eat, but I was focused on one thing: Having a large screen and surround sound system for watching movies.
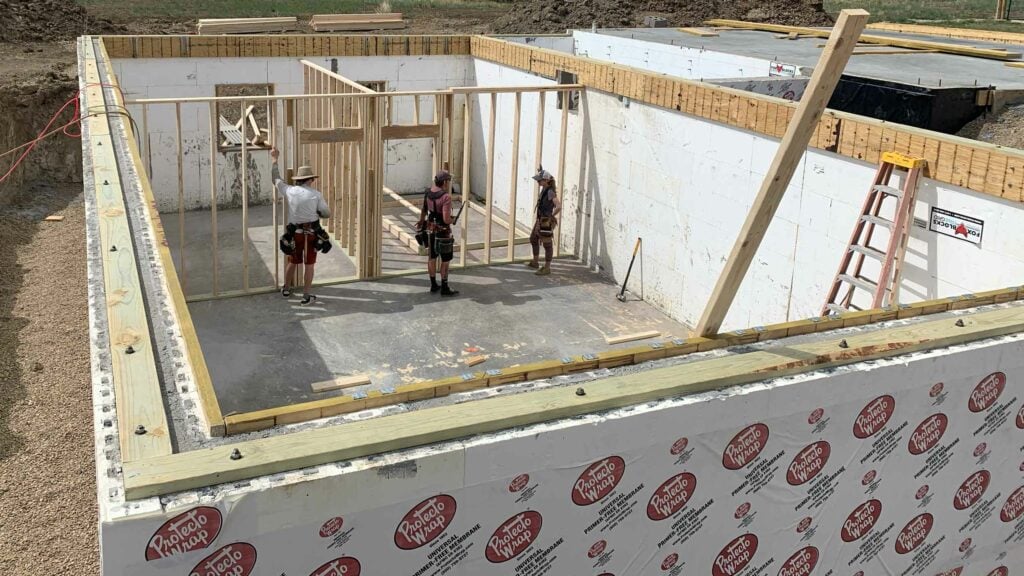
At the start I wanted to have two thirds of the basement be one huge open room. It would have been 23 feet wide and 27 feet long. Then our builder told me how large of a beam they would need to install to make that work. We quickly redesigned the basement to have a weight bearing wall halfway across the 27 foot run. This added two bedrooms/offices/workout rooms at the south end, with a large room in the center.
Weight bearing wall installed.
While the center room ended up about half the size I had originally wanted, it was still plenty large enough for a 120 inch projector screen. Going from a 13 inch laptop would be quite the upgrade.
With the room size determined, layout was the next focus. For a projector to create a 120 inch screen you generally want about 12 feet of distance from the lens to the screen. That is also the ideal distance to sit from a 120 inch screen so that you can see everything without turning your head.
Since the room is 23 feet by 13 feet I could have pointed the projector to any wall in the room. However from a sound system perspective it is best to have some distance behind your head and the back wall. This allows you to place the rear and surround channel speakers further behind for greater effect. It also helps with reverb and acoustic stuff.
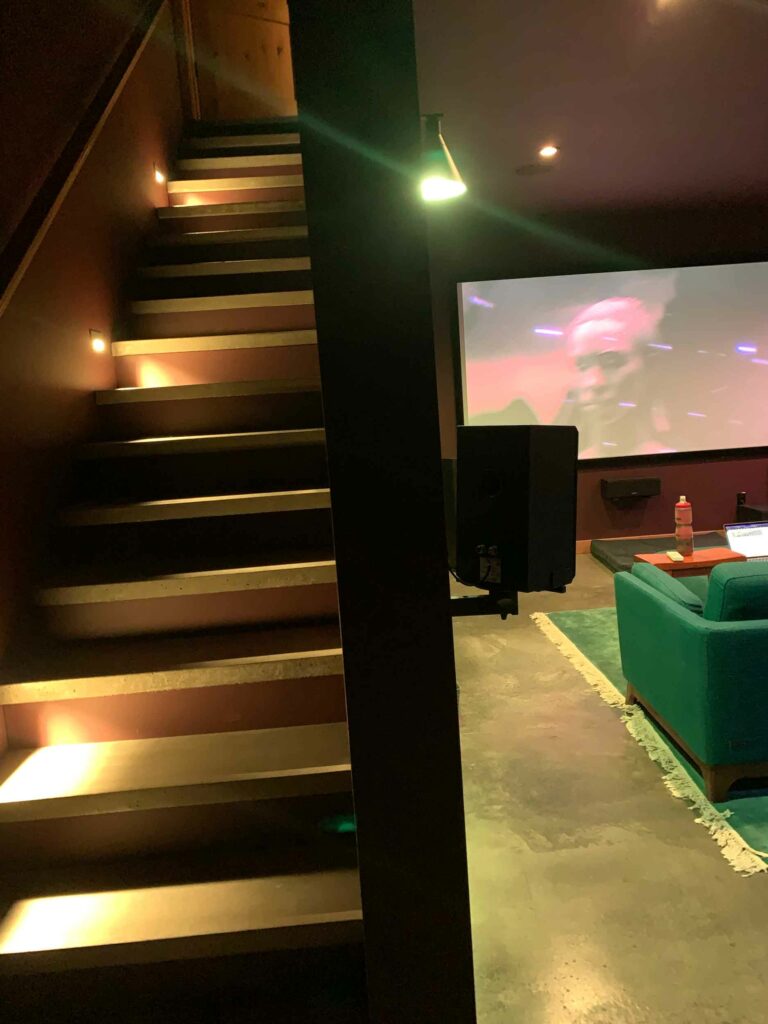
With sound in mind it made sense to either place the screen on the east or west wall. Since the stairwell comes down to the west it made the most sense to place the screen on the east wall. This would allow me to place low level stair lights that would not effect the image quality. Also when you enter the theater room you aren’t walking in front of the screen.
One thing I picked up while learning about home theater design is to place your receiver and electrical equipment to one side of the room. Then you don’t have to see the lights from the equipment when watching the screen.
The stairwell comes down on the north side of the theater room. So we added a cubby hole under the stairs where I can put the electronics, with room for expansion.
Whats in the cubby?
With the location of the receiver determined I knew where to run all the speaker wire. The question was how many speakers to run. Dolby surround sound comes in a number of flavors:
5.1 is the bare minimum with the standard left and right front channels, a center channel, two surround channels, and one subwoofer.
5.2 adds a sub.
7.1 and 7..2 add two rear channel speakers.
5.1.2, 5.2.2, 7.1.2, and 7.2.2 adds two height channel speakers also known as Atmos.
5.1.4, 5.2.4, 7.1.4, and 7.2.4 adds four height/Atmos channel speakers
The most common setup is 5.1 and this is also the most common option recorded in most movies. More and more movies are adding height/Atmos support. I figured that speaker wire is pretty cheap so wired the room for 7.2.4 with the plan to setup 5.1.4 initially.
There were a few factors in opting for 5.1.4 for the initial setup:
There would be fewer speakers, which saves money.
I would only need a main receiver/amp to power everything.
The improvement in sound over my laptop would be incredible and probably enough, for now.
Once I had the layout configured it was time to start shopping for speakers, receiver, and projector. This is where I started feeling overwhelmed with the options and costs. It turns out that speakers, receivers, and projectors can all get crazy expensive and complicated.
In the end I went with some solid Sonyspeakersthatdidn’t break the bank but were high enough quality that they make the room feel solid. One thing I learned is that you want to stick with one speaker manufacturer for the entire system of speakers. Apparently they are tuned to each other or something like that. I feel like I read this on enough different websites and forums that it might be the truth and not some way for speaker manufacturers to sell more stuff.
I spent a solid chunk of change on the receiver to get 5.2.4 of speaker channels without an external amp. It also has future support for 8K projectors when we start using them in 4 to 5 years. The receiver should outlast the speakers and projector, so it made sense to invest there. I went with a Denon AVR-X4700H.
For the projector I initially thought I would go with a 1080p resolution as that would be good enough, and it would keep the costs down. As 2021 progressed the price of the BenQ HT2050A crept upward to $700 while its 4K replacement, the BenQ HT3550, was holding at around $1700. More than doubling the price but giving me beautiful 4K resolution. Then I saw a refurbished option for just over $1200 and jumped on that.
With the equipment selected I needed to start thinking about finishing the theater room. Paint was a big decision. You do not want to use white or any bright colors in a theater room. The light from the projector or TV will bounce off of the bright walls and wash out the image. Ideally black is the best color for a theater room as it absorbs the light and makes for the best viewing experiences.
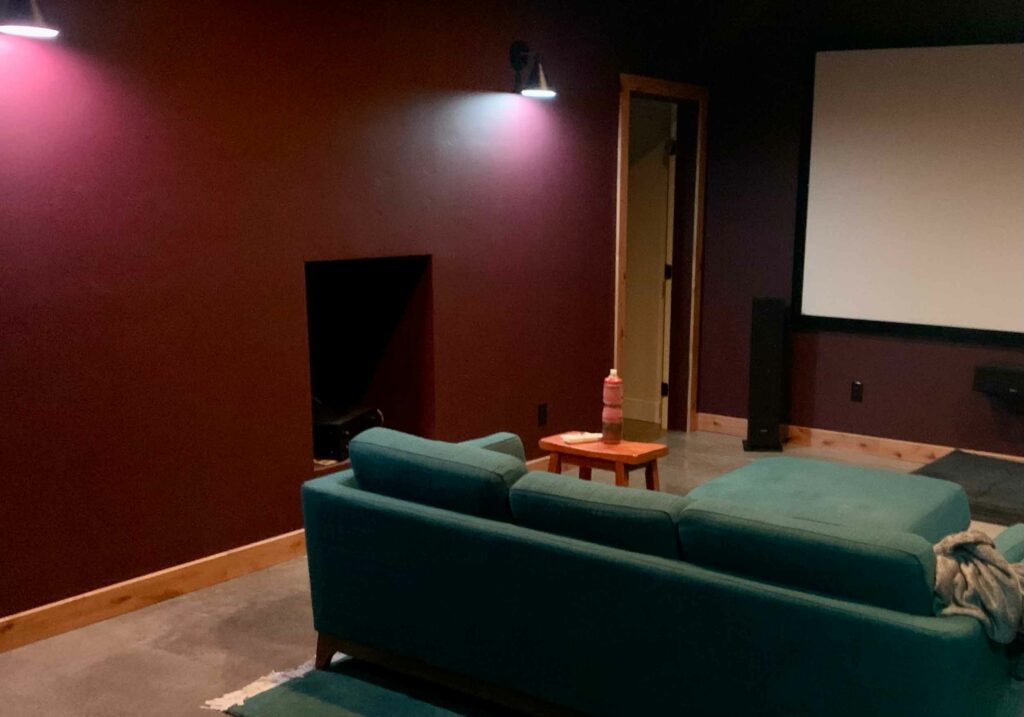
Unfortunately a black room is also a bit terrifying because it is black. Burgundy is often used instead to create a more comfortable room when you have the lights up and aren’t watching a movie. While we were looking at paint colors for the rest of the house I started evaluating dark reds. Eventually I settled on Sherwin Williams’ Merlot.
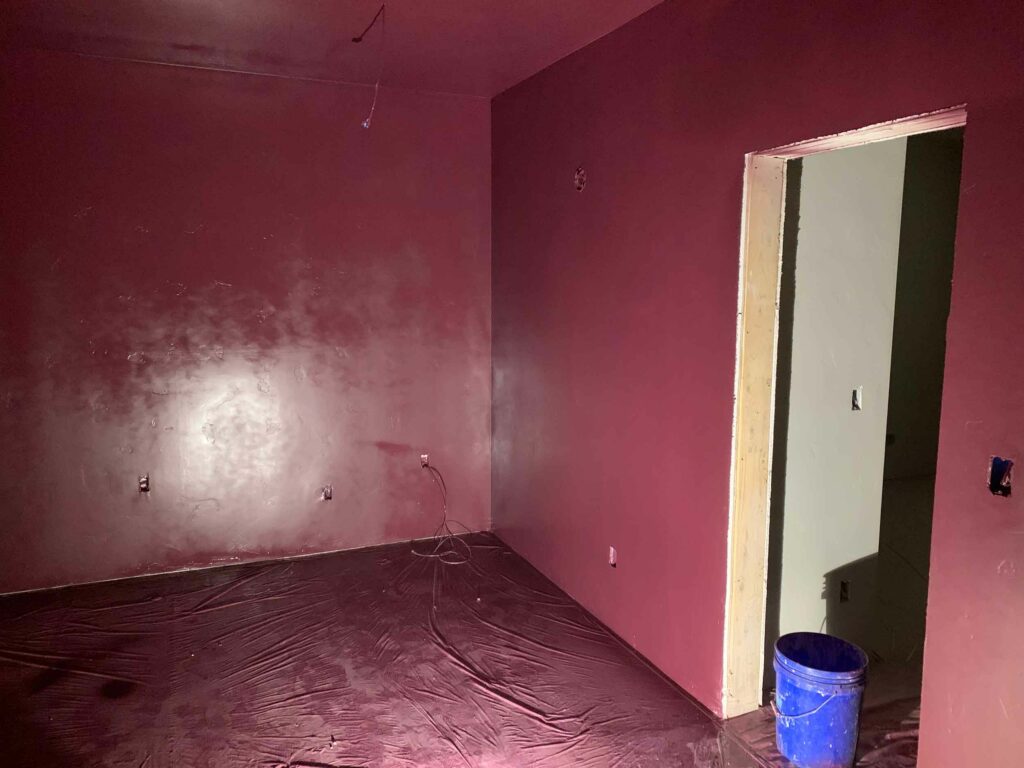
Color is the most subjective thing I can think of and I got quite a few side glances from the builders when I proposed painting the stairwell and entire theater room with this dark color. I had a few panic moments over my decision, especially after it was first applied to the walls and ceiling. In its wet state it gave off a lot of sheen and looked really scary.
Something from a horror film.
Fortunately it dried to the correct sheen and became much more comfortable to live in. I am really happy with how it came out and think that it works well when watching a film but also is nice to sit in with the lights on. I primarily work from this room sitting on the couch.
I have learned to leave the projector off during the workday as it is just too distracting. One really cool thing about the Apple TV is that I can use the projector as a monitor with no cables involved.
More of a novelty than anything productive.
With the walls painted and the house finished it was time to install and test the setup. I was pretty nervous about the speaker wiring and if I had installed it all correctly. I was also nervous as a lot of construction happened after I installed the wiring. Did the dry-wallers cut or crimp any of the wiring?
Fortunately everything worked and the home theater is my favorite room in the house. I need to work on hanging acoustical panels on the walls and ceiling, but it sounds fine to me right now. I can also add another sub but the existing one sounds fine and creates enough bass to elicit noise complaints from upstairs already. I can also add two rear channel speakers but need to get another amp for that. If I do that upgrade I will have the amp power the two front and center speakers and connect it to the Denon via the pre-outs. The HDMI cable is run through a conduit so that I can replace it when the HDMI standard is inevitably changed again. However there is no hurry to spend more money on this project right now.
All said I spent a little over $4000 on the electrical equipment for the theater room. Not cheap compared to a TV with a soundbar, but very cheap compared to most of the home theater setups I have seen online. Looking back at the project the only thing I would have done differently would have been to run the speaker wires longer. Right now one of the runs is a little short and makes the setup in the cubby a bit cramped.
When we were building the house Kate was a bit dismissive of the theater room. She did not grow up watching TV and movies so does not share my addiction. Now that we have moved into the house she has started warming up to the benefits of having a dedicated theater room. It allows us to keep the living room free of a TV, which we both prefer. However when the mood strikes we can easily retreat downstairs and enjoy some escapism.
Kate and I moved into our new home almost 3 weeks ago. Awesome is the word that sums up the entire situation. We designed the home to be exactly what we wanted based on a few criteria: It will be our forever home, we wanted to highlight the views of the La Plata mountain range to the east, it should be highly efficient and follow Passive House design concepts, and we need to be able to work full time here.
Forever Home
How can we say that this is our forever home? We cannot but we went into the project with that mindset. We are not trying to build something that we flip in a few years and then move onto the next project. Instead we want to have a home that we can see ourselves aging into in various ways. The first design that this influenced is the guest bedroom.
2020 made a lot of realities hit really hard. The idea that we will always be in good health and fully capable is much more fragile now. When we thought of our parents the reality felt even more immediate. This caused us to think of the guest bedroom as a place that needed to accommodate someone in almost any condition. So it follows the American’s with Disabilities Act (ADA) guidelines for making a bedroom and bathroom accessible. There is at least 30 inches of clearance throughout the room. The doors are 36 inch pocket doors which are easier to handle from a wheelchair. We have also added extra blocking in the walls around the shower and toilet for pull bars.
We also built the guest bedroom with the same dimensions as our master bed upstairs. If at somepoint we get tired of climbing the stairs, we can move into the guest room on the main floor. It still has a great view of the mountains too.
The kitchen was designed so that multiple people can operate in there at the same time without causing conflict. We put plenty of walking space between the counters and built a large pantry so someone can even work in there. We did not follow ADA guidelines with the countertop heights. Kate is 5’8″ and I am 6’2″ and most countertops are too low for us to work at comfortably. We had them built at 39.5 inches, about 3 inches taller than normal.
Finally we wanted a home where we could host guests and have other people enjoy themselves. For this we have multiple guest rooms and plenty of restrooms. The dining room and living room allow us to bring a lot of people together and connect.
Views of the La Platas
One of the first things we recognized about this land when we bought it was the views of the La Plata mountain range to the east. We knew we wanted to see them from the new house but Kate took it to another level. We have 11 windows on the east side of the house, each giving us a different way of viewing the mountains.
There is a lot of exposure to the morning sun which helps wake the house up really quickly. We built the eave of the eastern roof long enough to provide shade to these windows as the sun rises higher during the day. This should help prevent too much solar gain, and overheat the home. We will probably need to add some type of window coverings in summer, but right now in winter the solar gain is very nice.
Passive House Design
When we started designing and researching how to build our home we learned about the Passive Home(PH) design concept. In a nutshell PH design focuses on using as little energy to heat, cool, and power a building, and sealing the home tightly so that it does not lose the conditioned air.
As we learned more about PH design we quickly realized that we were going to want to work with someone familiar with the concept. We weren’t necessarily interested in spending the money to be PH certified, but we still wanted to follow the concepts and practices involved. This was also the main reason we reached out to the builder who would eventually become our builder, they had build a number of PH homes and were well versed in the concepts.
Since the home would be sealed very tight it needed a ventilation system, so that we get fresh air in the home. The solution to this issue is installing a Heating Recovery Ventilator(HRV) or Energy Recovery Ventilator(ERV) system. These systems pull air from places like bathrooms, the kitchen, and mudroom and sends fresh air into the bedrooms and living spaces. In the mid point of the system lies an exchanger that pulls heat from the exhaust air and adds it to the incoming fresh air. The difference between and HRV and ERV is that the ERV also pulls moisture to help keep humidity at a constant level.
In addition to saving energy by keeping the heated air in the home these systems are designed to run on very little power. This helps keep the overall PH design principles in mind.
We went with an ERV system since we live in a dry climate and want to keep as much moisture as possible. If you ask 9 people who work with HRV and ERV systems which one you should use, based on your climate, you will probably get 11 different answers.
We will also have solar photovoltaic panels added to our southern facing roof. This will be grid tied and offset all of our power usage and then some. Eventually we will end up with an electric vehicle and have wiring setup for a Level 3 charger in the garage.
Full Time Workspaces
Kate and I both work remotely for our jobs. We needed spaces that allow us to focus and be on calls without interrupting each other. We knew early on that Kate would be using the Loft as her Loftice. It has all the views she wanted but is still a separate space from the main living area. Personally I do not like having natural light when I am working on my computer. So part of the purpose in building a basement was for my office.
For internet we use Starlink since we are in a remote rural area. There are other options, but Starlink is far and away the fastest and most reliable connection. Dishy is mounted on the NorthWest corner of the Garage roof. This gives it plenty of sky with zero obstructions, and makes it easier to access versus putting it two floors up on the main roof.
Dishy’s PoE Cat 6 cable runs through the garage attic to a centrally located closet by the Kitchen. From there we have Wifi to the above ground parts of the house, and a switch that carries Cat 6 to both offices and the theater room. A second Wifi Access Point is in the basement to give better signal down there. So far everything is great with all areas of the house getting full Starlink speeds wirelessly.
How’d we do?
Overall the builders hit all of the marks that we wanted, and we are enjoying our home immensely. We are incredibly fortunate to have been able to do this at any time in our lives. When we hit the road full time 7 years ago this was not on the roadmap, but things change and here we are. I cannot say if we will live here forever but right now I feel like we could.